Human capital
/Company data
Company Data
1. Navigate to the "Staff" module.
2. Creating a new record in the "Staff" module can be done using the "Create" button in the top right corner.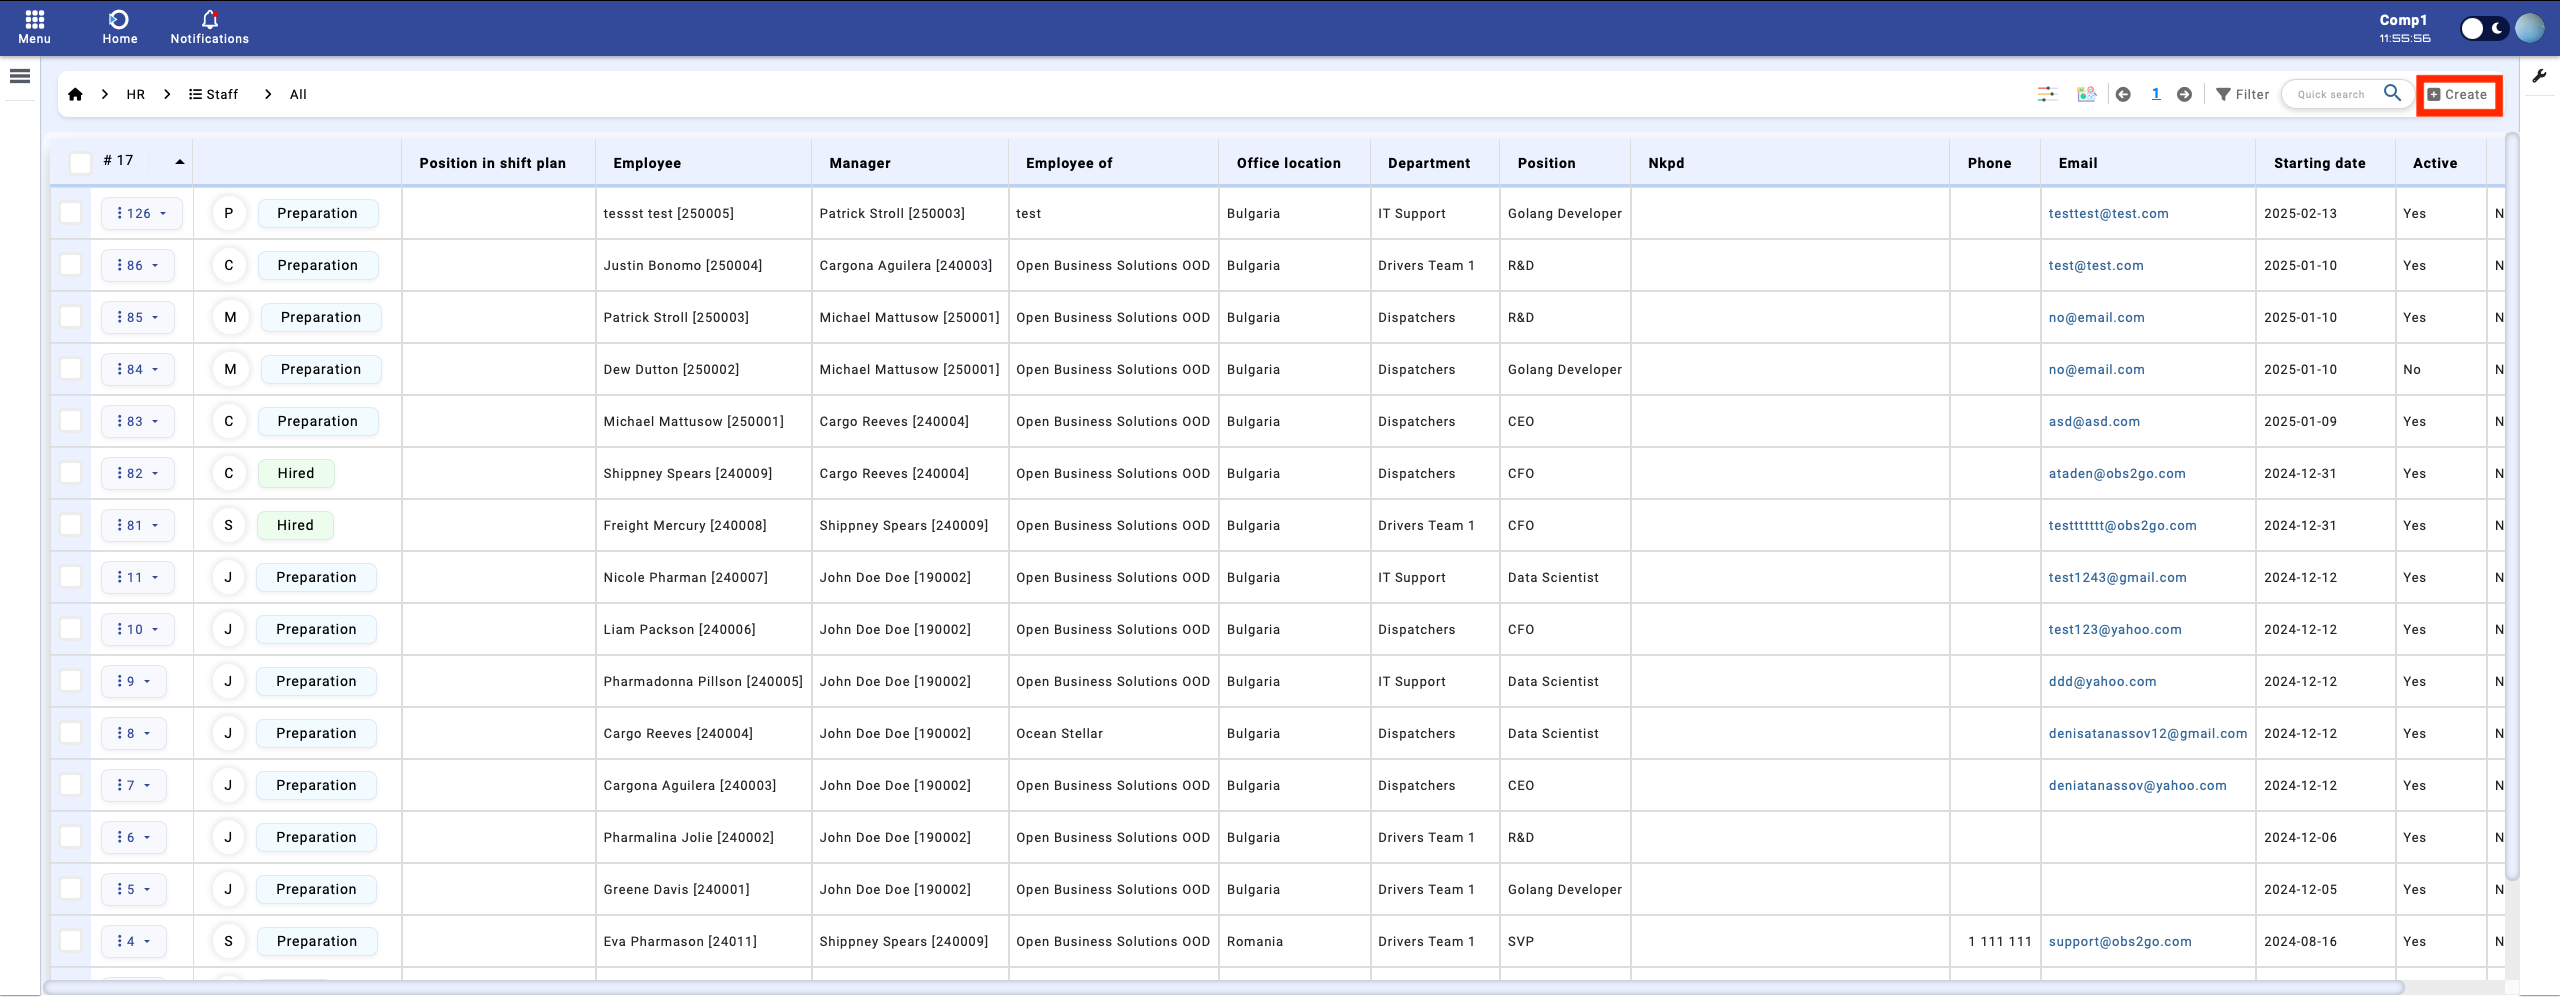
Module 'Staff'
3. The creation form will open. Fill in all the required information. (If a mandatory field is left blank, the system will notify you and the record won’t be created.)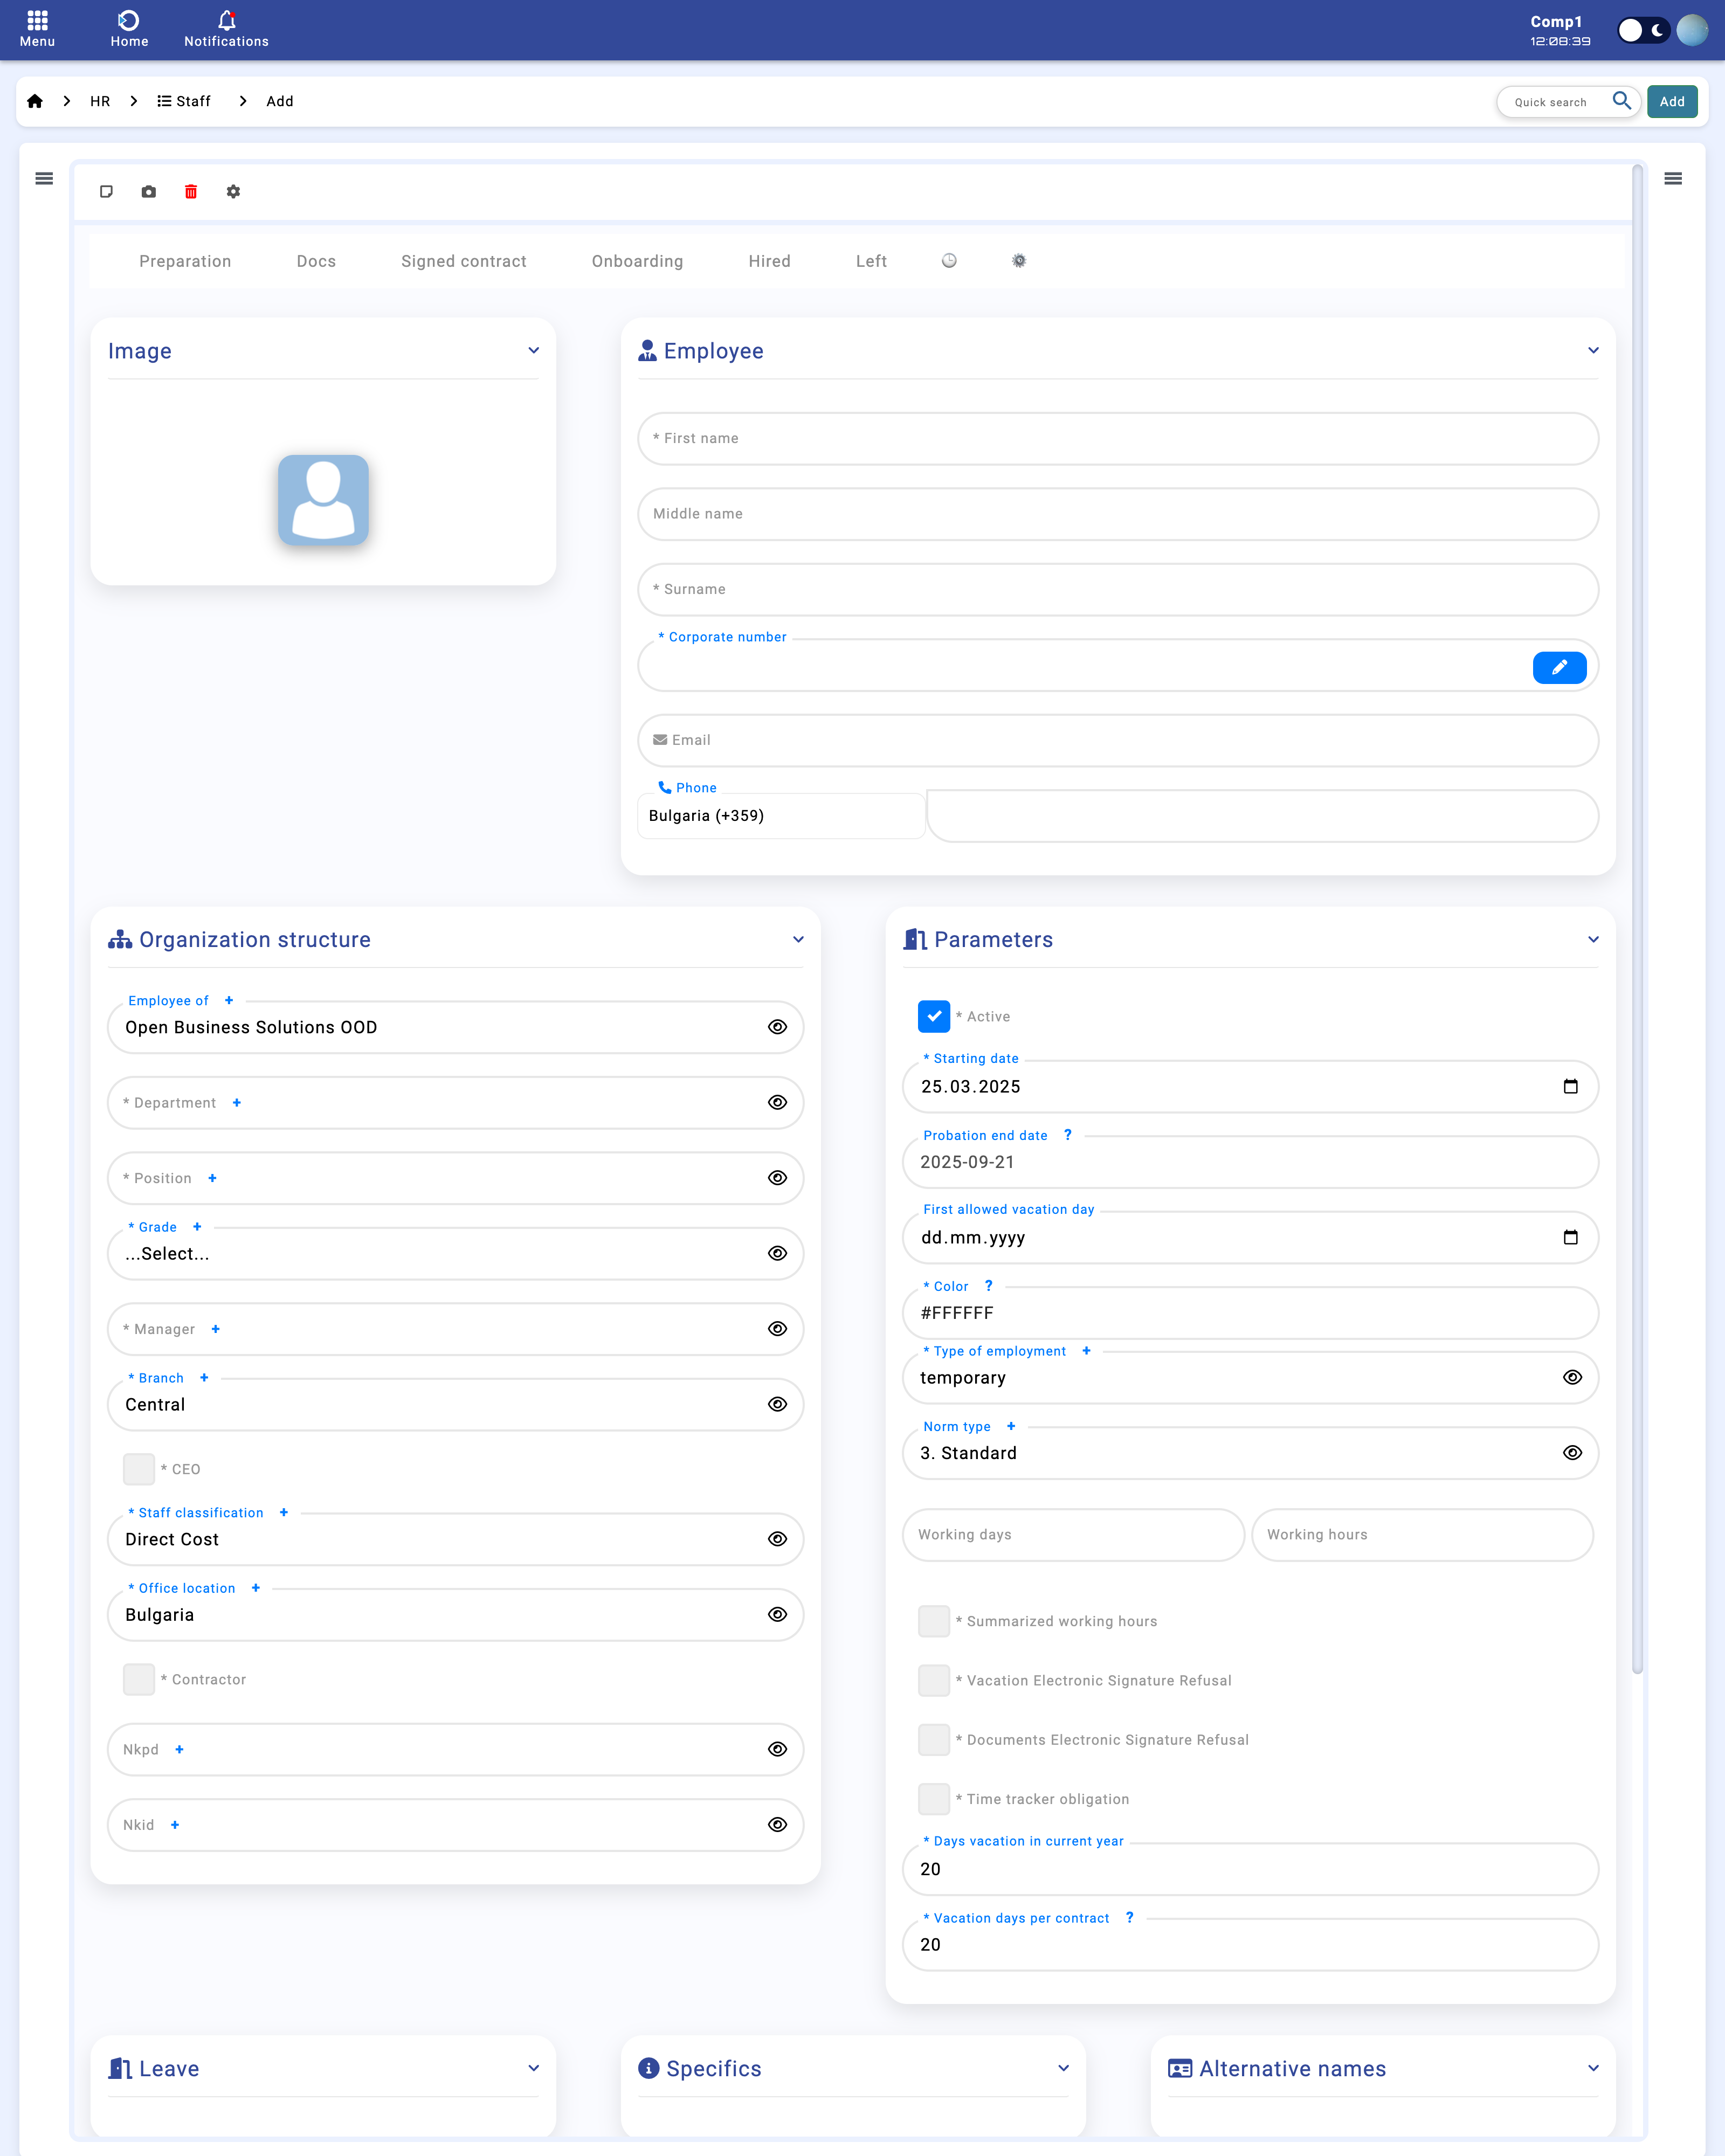
Module 'Staff' -> Creation of record
Fieldset 'Employee':
- Field 'Corporate number':
Each corporate number is automatically generated by combining two parts:
1. Year Component: The first two digits come from the last two digits of this year.
2. Sequential Component: The remaining four digits represent the order in which the staff member is added during this year.
For example, if a staff member is the very first one added this year, their corporate number will be YY0001 (where YY are the last two digits of the current year). If they are not the first, their corporate number will be the next sequential number following the last assigned corporate number for this year.
This system ensures that every corporate number is unique and indicates both the year of registration and the order of entry.
You can also edit the 'Corporate number' by clicking the 'pencil' icon next to the field, which allows you to modify its value.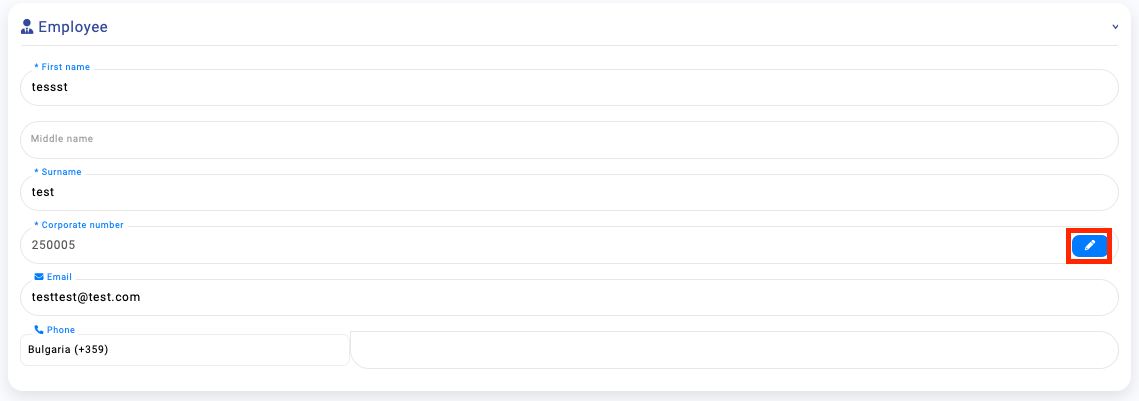
Fieldset: Organisational Structure
- Employee Of: Select the company for which the staff member will be assigned. If you manage multiple companies, you can choose from any available company.
- Department: Choose the department where the staff member will work.
- Position: Indicate the staff member’s role or position within the company.
- Manager: Select the staff member’s manager from the provided list.
- Staff Classification: Classify the staff member as either a direct cost (costs directly attributable to a project or department) or an indirect cost (overhead expenses not directly tied to a project).
- Office Location: Specify the physical location or office where the staff member is based.
- NKPD and NKID: These fields are used in Bulgaria for contract management. NKPD represents the classification code for products and services as defined by Bulgarian standards, while NKID is the corresponding unique identifier.
Fieldset: Employment Details
- Active: Indicates whether the staff member is currently active. Mark this field if the employee is actively working.
- Starting Date: Specifies the date on which the staff member begins their employment.
- Probation Period: Automatically updated based on the deadlines set in the "Employment Contracts" and "Internal Transfers" (Additional Agreements) modules, as well as any employee absences.
- First Allowed Vacation Day: The date from which the staff member is permitted to take a vacation.
- Type of Employment: Indicates whether the employment is temporary or permanent.
- Norm Type: Select the applicable norm type, which may refer to standard working hours or other regulatory guidelines.
- Summarized Working Hours: (Leave blank for now.)
- Vacation Electronic Signature Refusal: Marks if the employee refuses to sign vacation-related documents electronically.
- Documents Electronic Signature Refusal: Indicates if the employee refuses to sign other documents electronically.
- Time Tracking Obligation: (Leave blank for now.)
- Days Vacation in Current Year: Specifies the total number of vacation days available for the current year, including any days carried over from the previous year.
- Vacation Days per Contract: Indicates the number of vacation days per year as defined in the employment contract. This information can also be automatically exported from the Employment Contracts module.
Fieldset: Leave (Filled when the status of the employee needs to be changed to 'Left')
- Last Working Day: Indicates the employee's final day of work.
- Reason to Leave: Specify the reason why the employee is leaving the company.
- Resignation Type: Describes the type of resignation, outlining how the employee is leaving.
Statuses in the 'Staff' module help manage employee workflows. Some statuses trigger automated actions when selected:
- Preparation: Selected when a record is created in the 'Staff' module.
- Docs: Triggers the generation of an employment contract in the 'Employment Contracts' module for the employee.
- Signed Contract: Set once the employee has signed the generated contract.
- Onboarding: Sends an email notification to the employee’s manager regarding the upcoming onboarding process.
- Hired: Automatically creates shifts for the employee for the next six months.
- Left: Used when the employee is leaving the company. Before selecting this status, ensure that the fields in the 'Leave' fieldset are populated. Upon selection, all shifts scheduled after the employee's last working day will be deleted.
These options are used to manage user lifecycle and their assigned assets within the organization:
- Create user: Used to create a new user profile in the system. This is typically the first step when onboarding a new employee or contractor.
- Create employment contract: Generates a new employment contract for the selected user. This includes standard terms of employment and can be further customized if needed.
- Create additional agreement: Creates an additional agreement for an existing user with an active employment contract.
- Assign assets: Assigns company-owned assets (such as laptops, phones, or access cards) to a user. This action logs the items under the user's name for tracking and responsibility purposes.
- Return assets: Used when an employee returns previously assigned assets. This helps keep the asset registry up-to-date and ensures accountability.
- Reassign assets: Allows the transfer of assets from one user to another. Useful when reallocating devices or tools internally.
- Check user (Evrotrust): Initiates a verification process through Evrotrust to validate the identity of the user.
- Departure: Marks the employee's departure process. Triggers any final steps such as asset return, access revocation, and status updates in other modules.
The process of adding new employees has been streamlined through a series of helpful automations. These features reduce the need for manual setup and ensure consistency across the system:
- Automatic user deactivation and shift cleanup: When an employee’s status is set to Left, their user is deactivated and all assigned shift codes are removed from the system.
- Automatic company linking: When a new employee is created with a specific company, the system automatically updates the active users list for that company in the Our Companies module.
- Vacation day updates: Employee vacation balances are automatically updated as needed.
- Permission-based visibility: Access to personal information is limited based on user privileges and company settings.
- Asset assignment checks: Employees cannot be deactivated if they still have assigned assets, preventing data inconsistencies.
- Corporate number generation: Each employee receives a unique corporate number automatically, based on:
- Year component: The first two digits represent the current year.
- Sequential component: A four-digit number showing the order of entry for the year.
For example, the first employee added in 2025 will have the number 250001.
You can manually edit the corporate number by clicking the pencil icon next to the field.
- Required hours setup: Each employee is automatically assigned their required working hours.
- User account creation: A user is automatically created for the employee in the Users module using their email as a username.
- Profile creation: An employee profile is generated automatically during creation.
- Shift adjustments after office change: If the employee’s office is updated, their shifts are automatically changed to match the new location.
These automations significantly reduce manual tasks during onboarding, making it quicker and easier to add employees while ensuring all necessary steps are handled consistently.
Editing an Existing Record in Module 'Staff'
In the "Staff" module, locate the specific record by clicking the corresponding number on the left side. Then, click the "Edit" button to open the record for that staff member.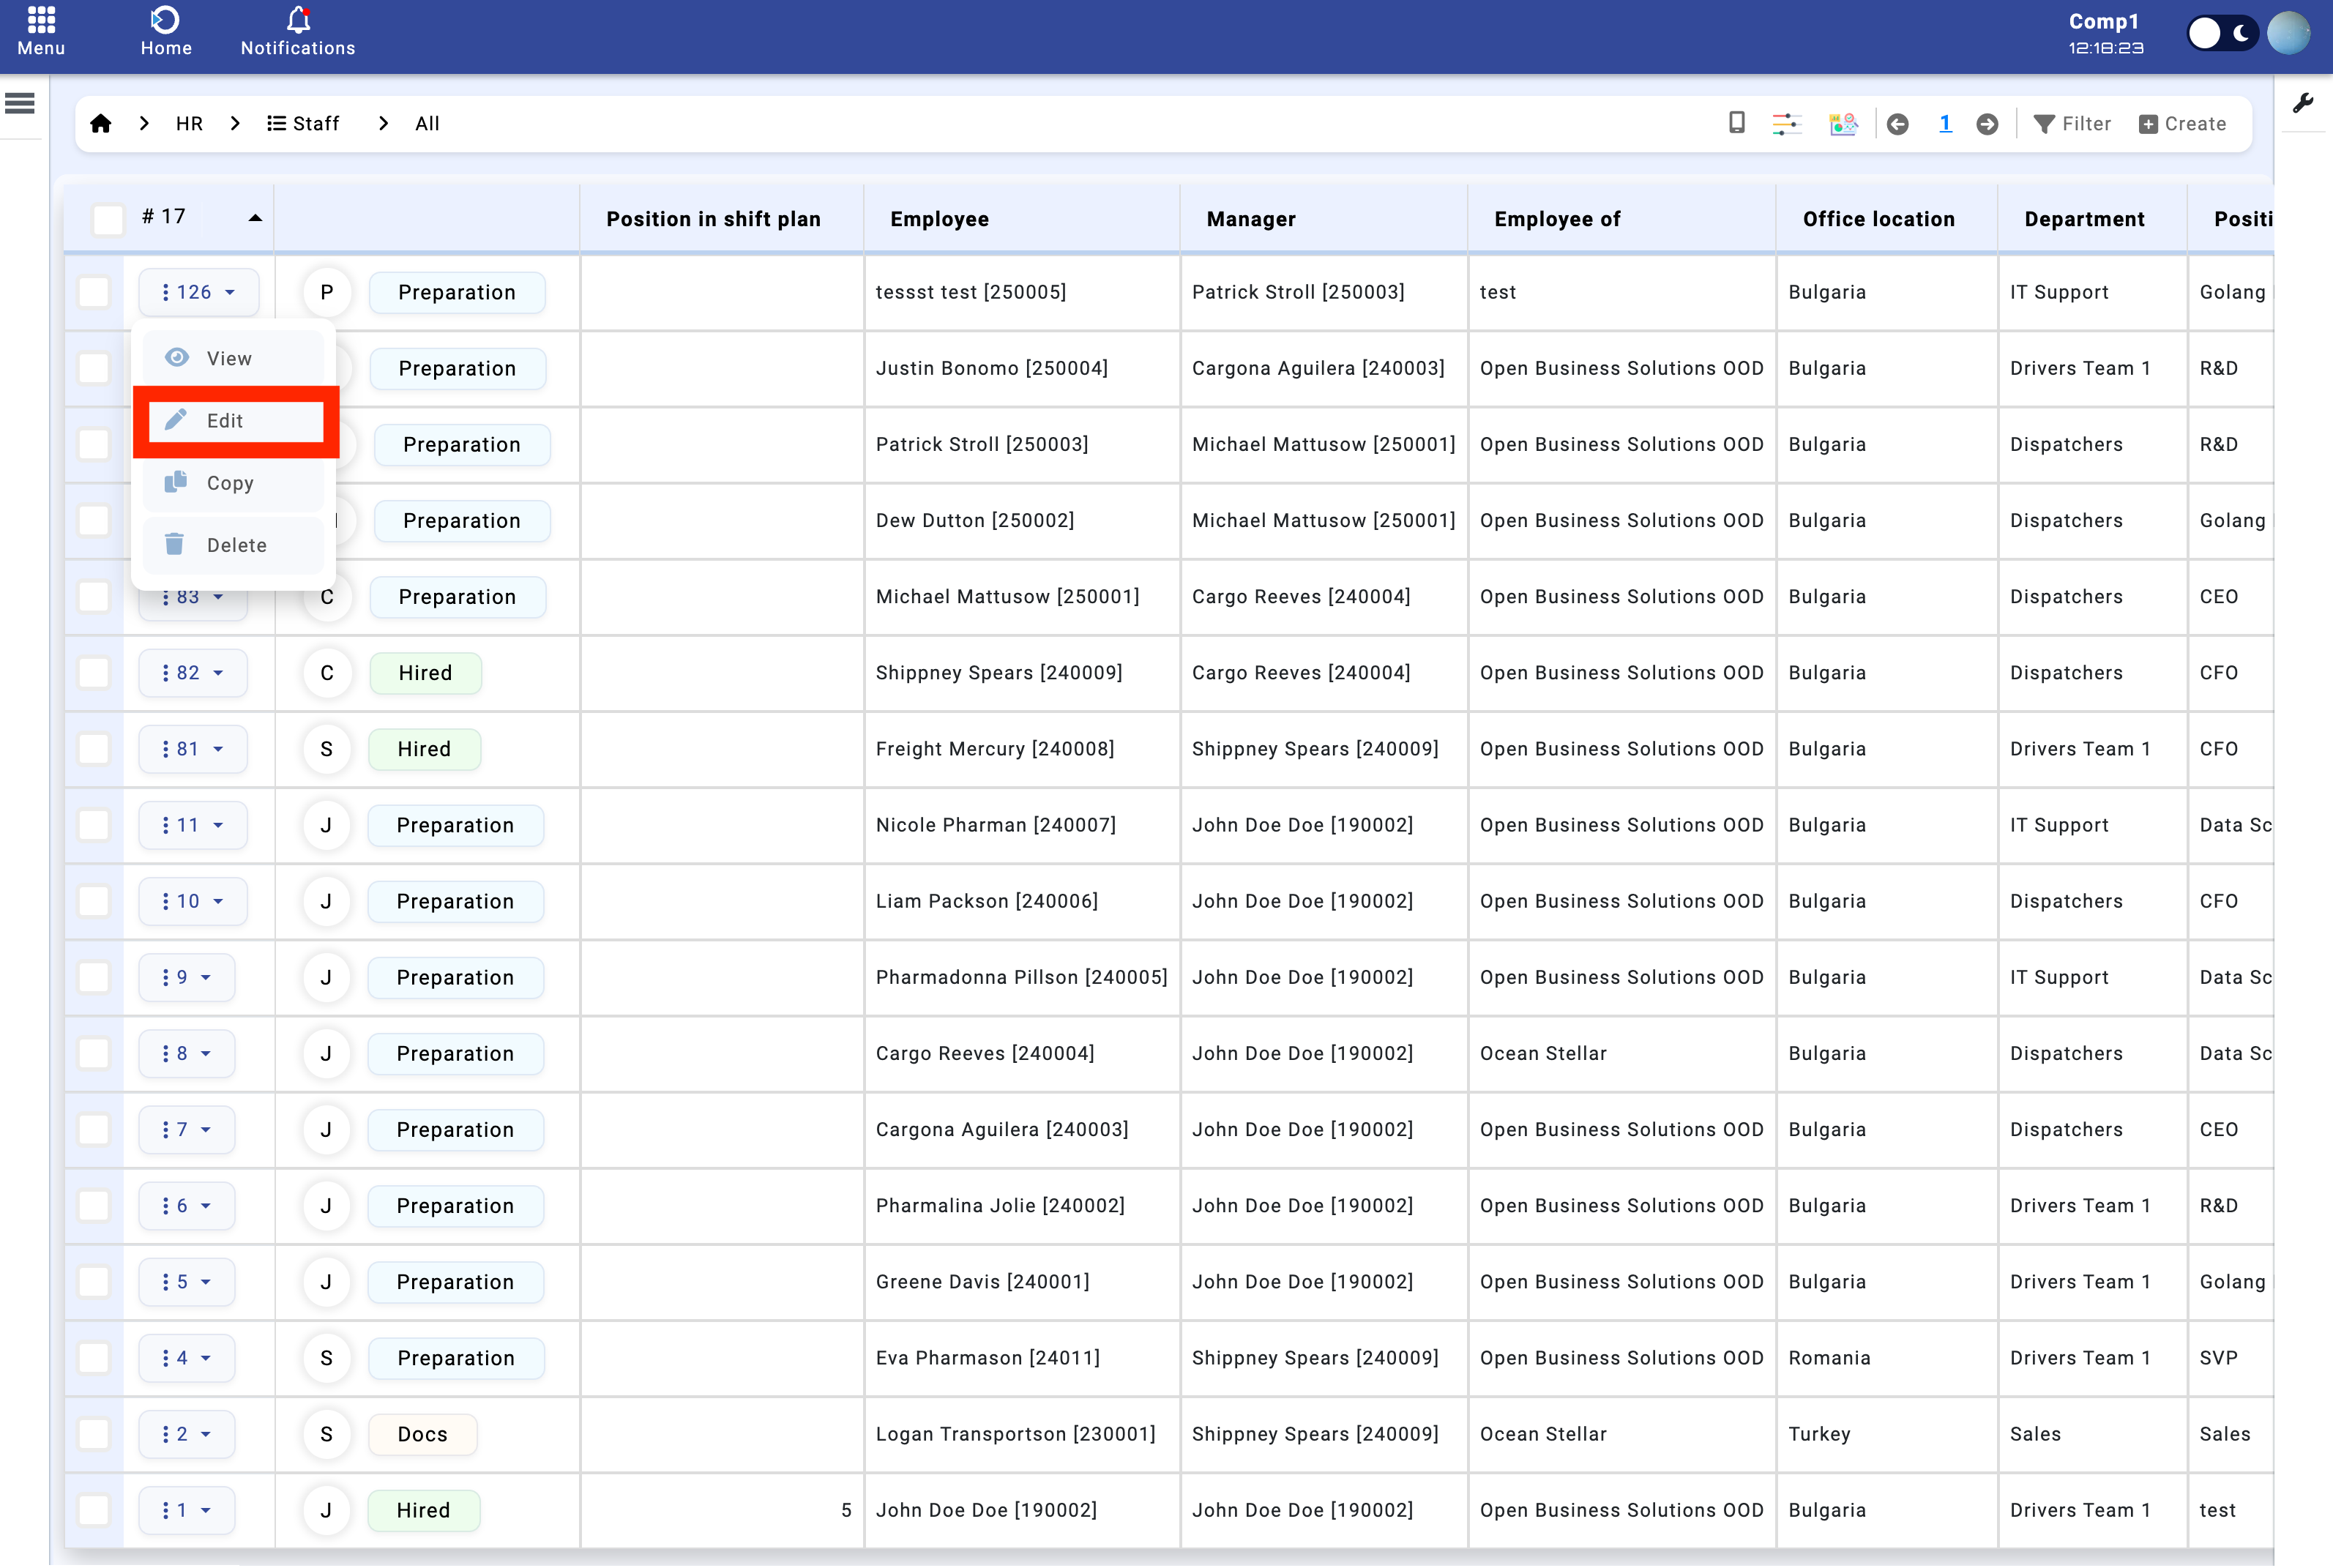
Module 'Staff' -> Edit record button
Once the record is open, update the necessary information. After making your changes, click "Save" in the top right corner to save your updates.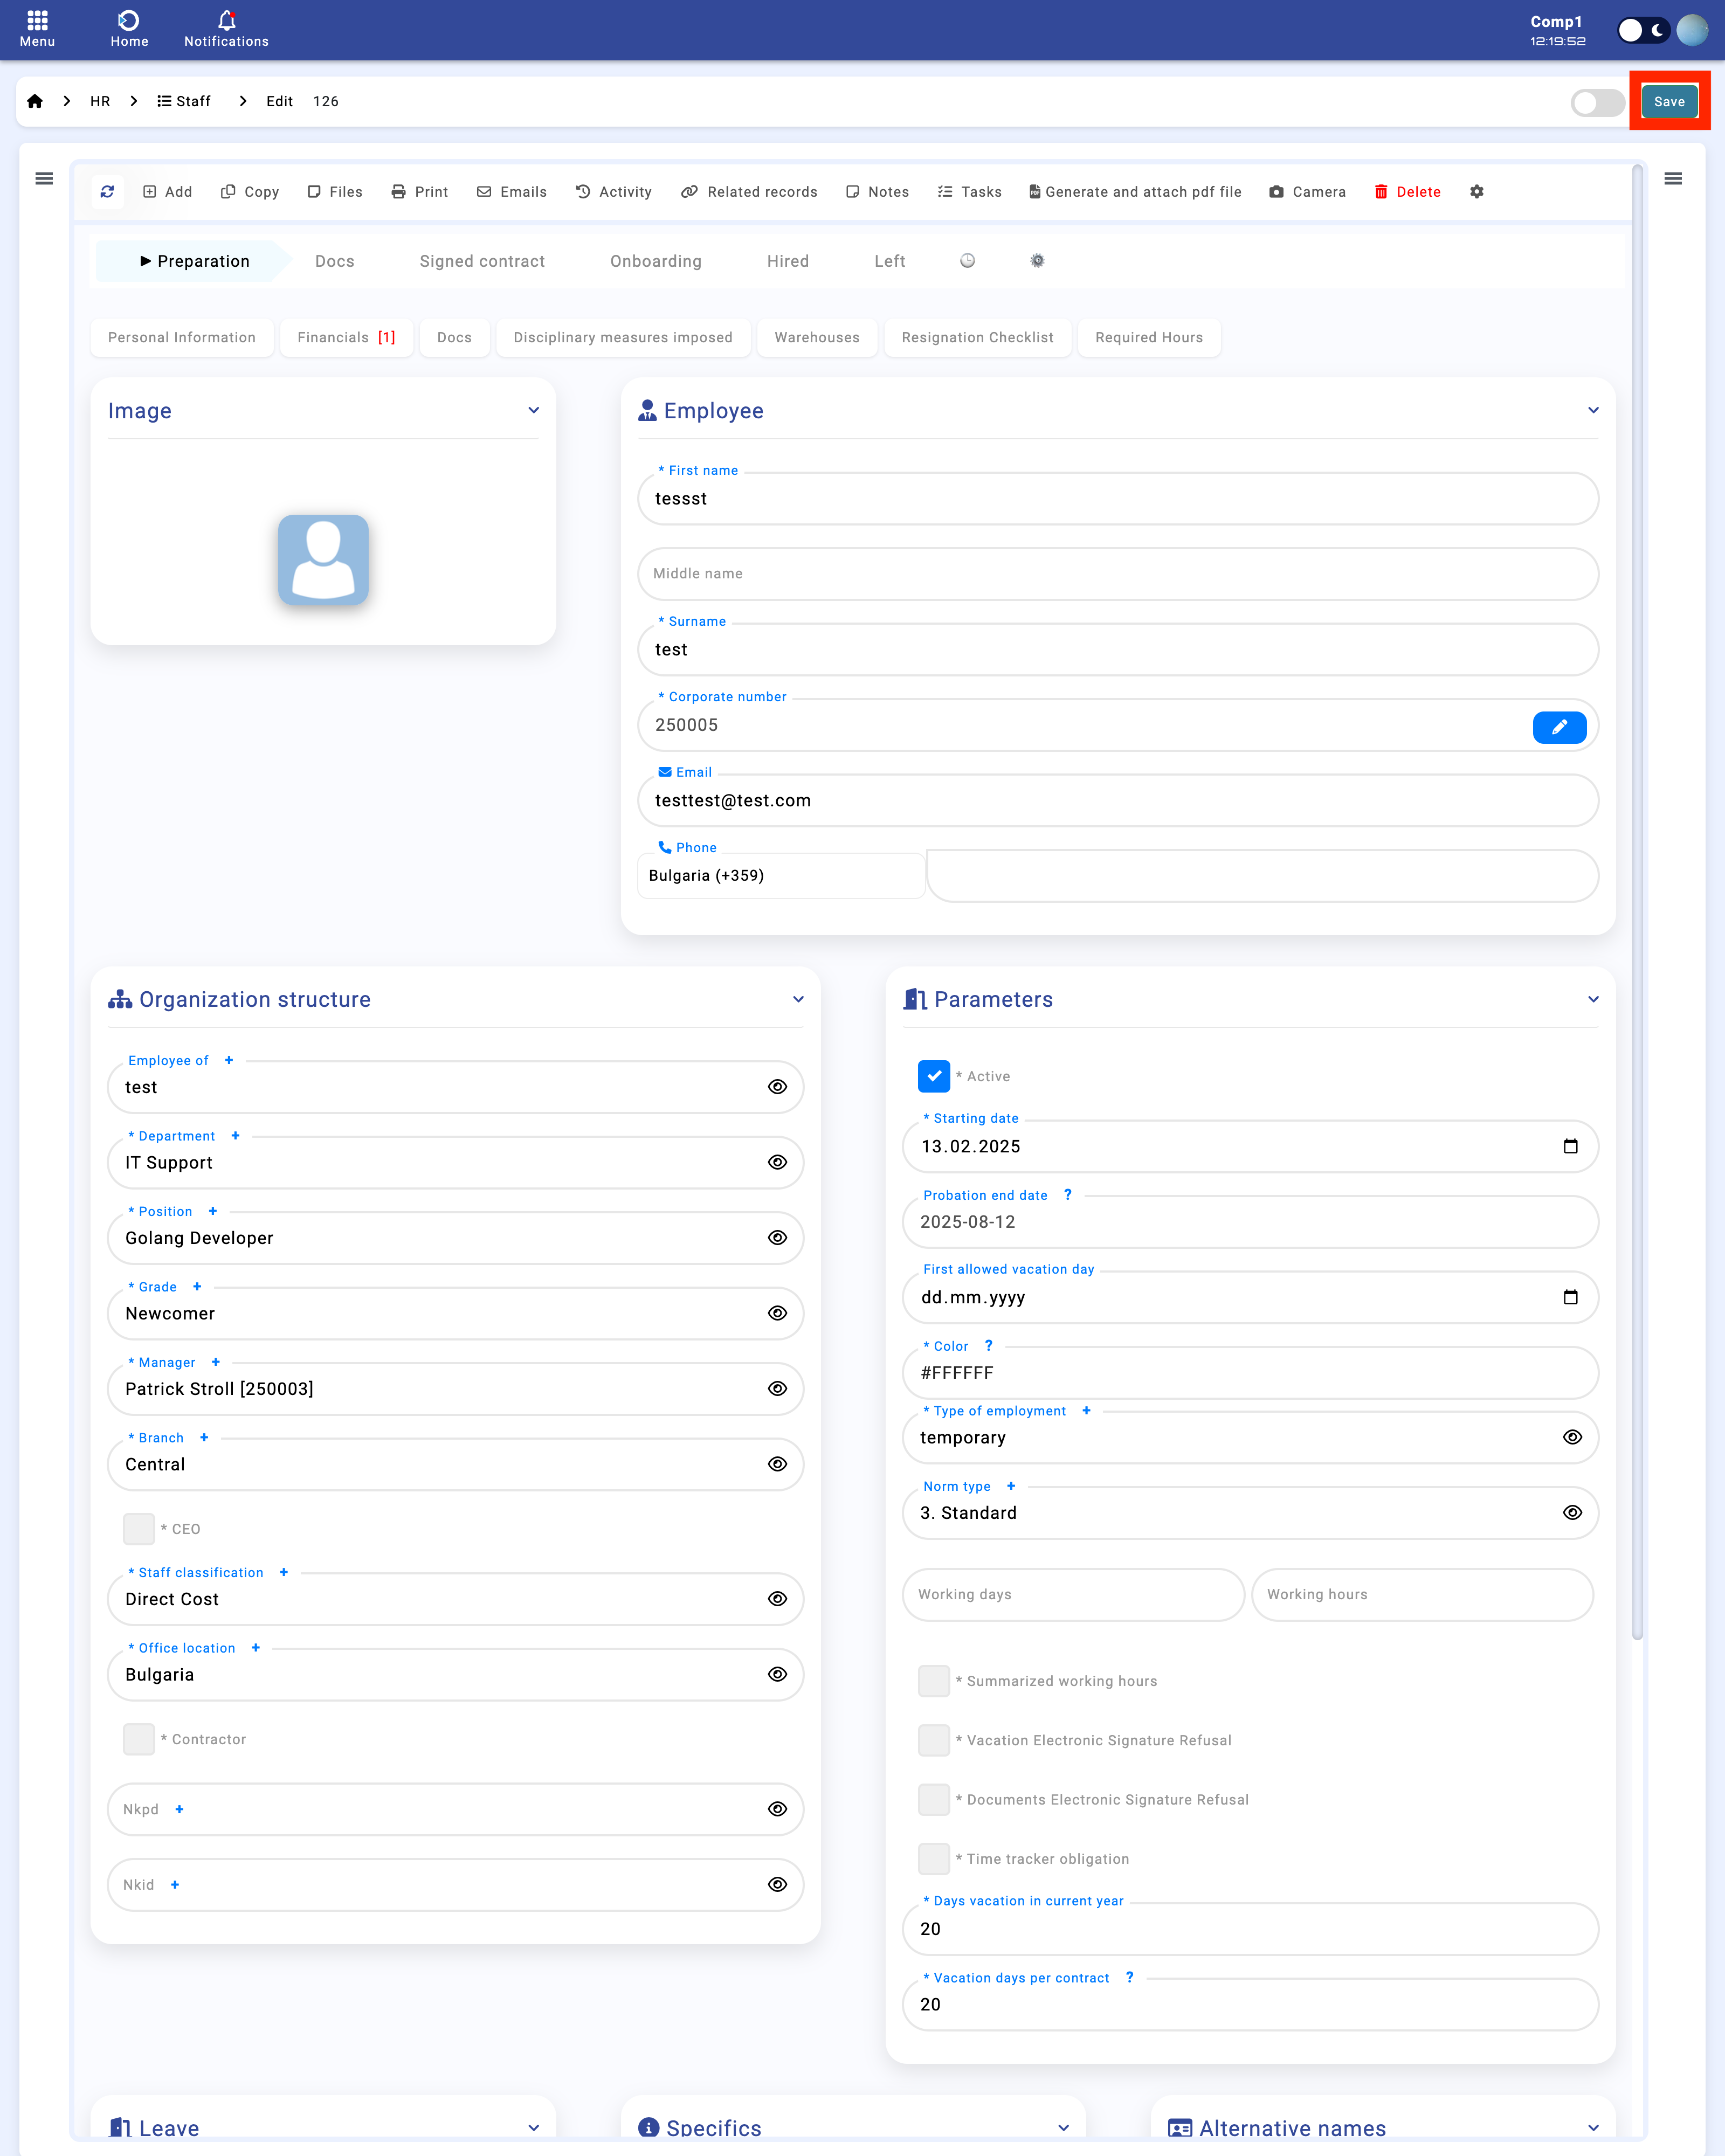
Module 'Staff' -> Edit record
Adding Personal Information to a Staff Record
While editing a staff record, click on the "Personal Information" tab. This will open a menu where you can add all the personal details for that staff member by clicking the 'Add' button.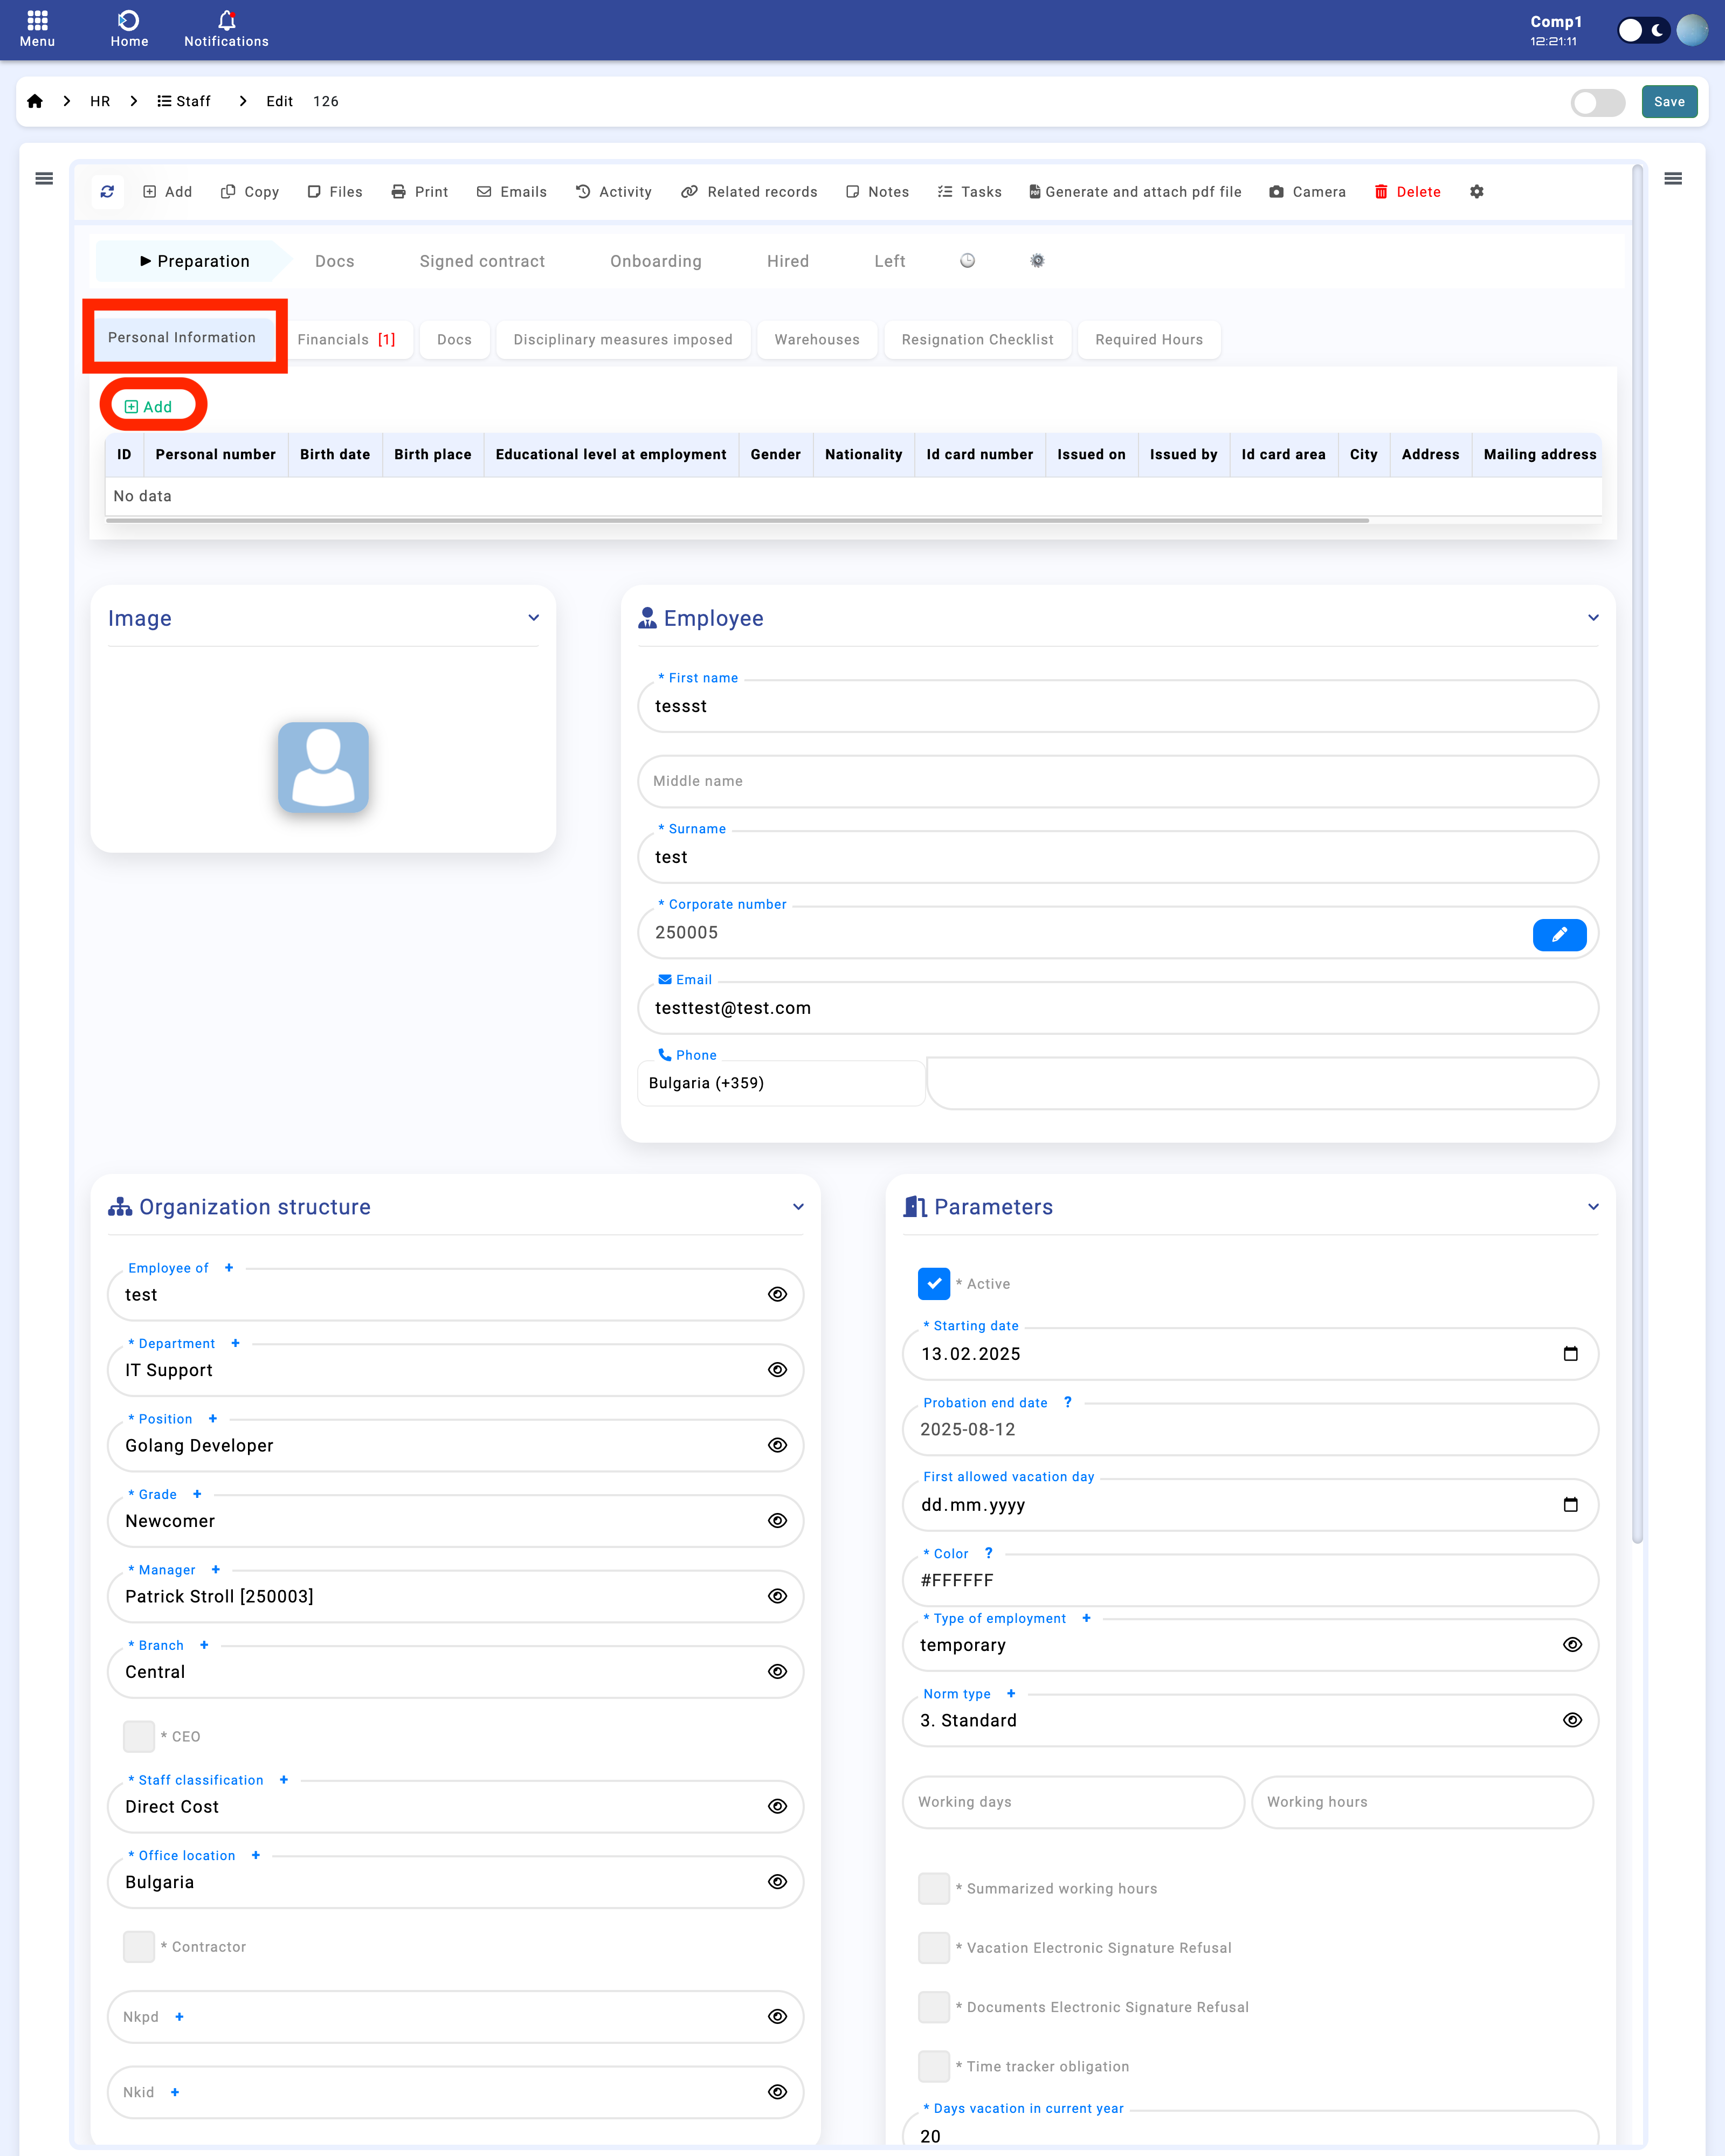
After filling in the required fields, click the "Add" button below the menu to save the new personal information.
To edit existing personal information, click the "Personal Information" tab again and then click the "pencil" icon. This action will open a menu on the right side where you can modify the details.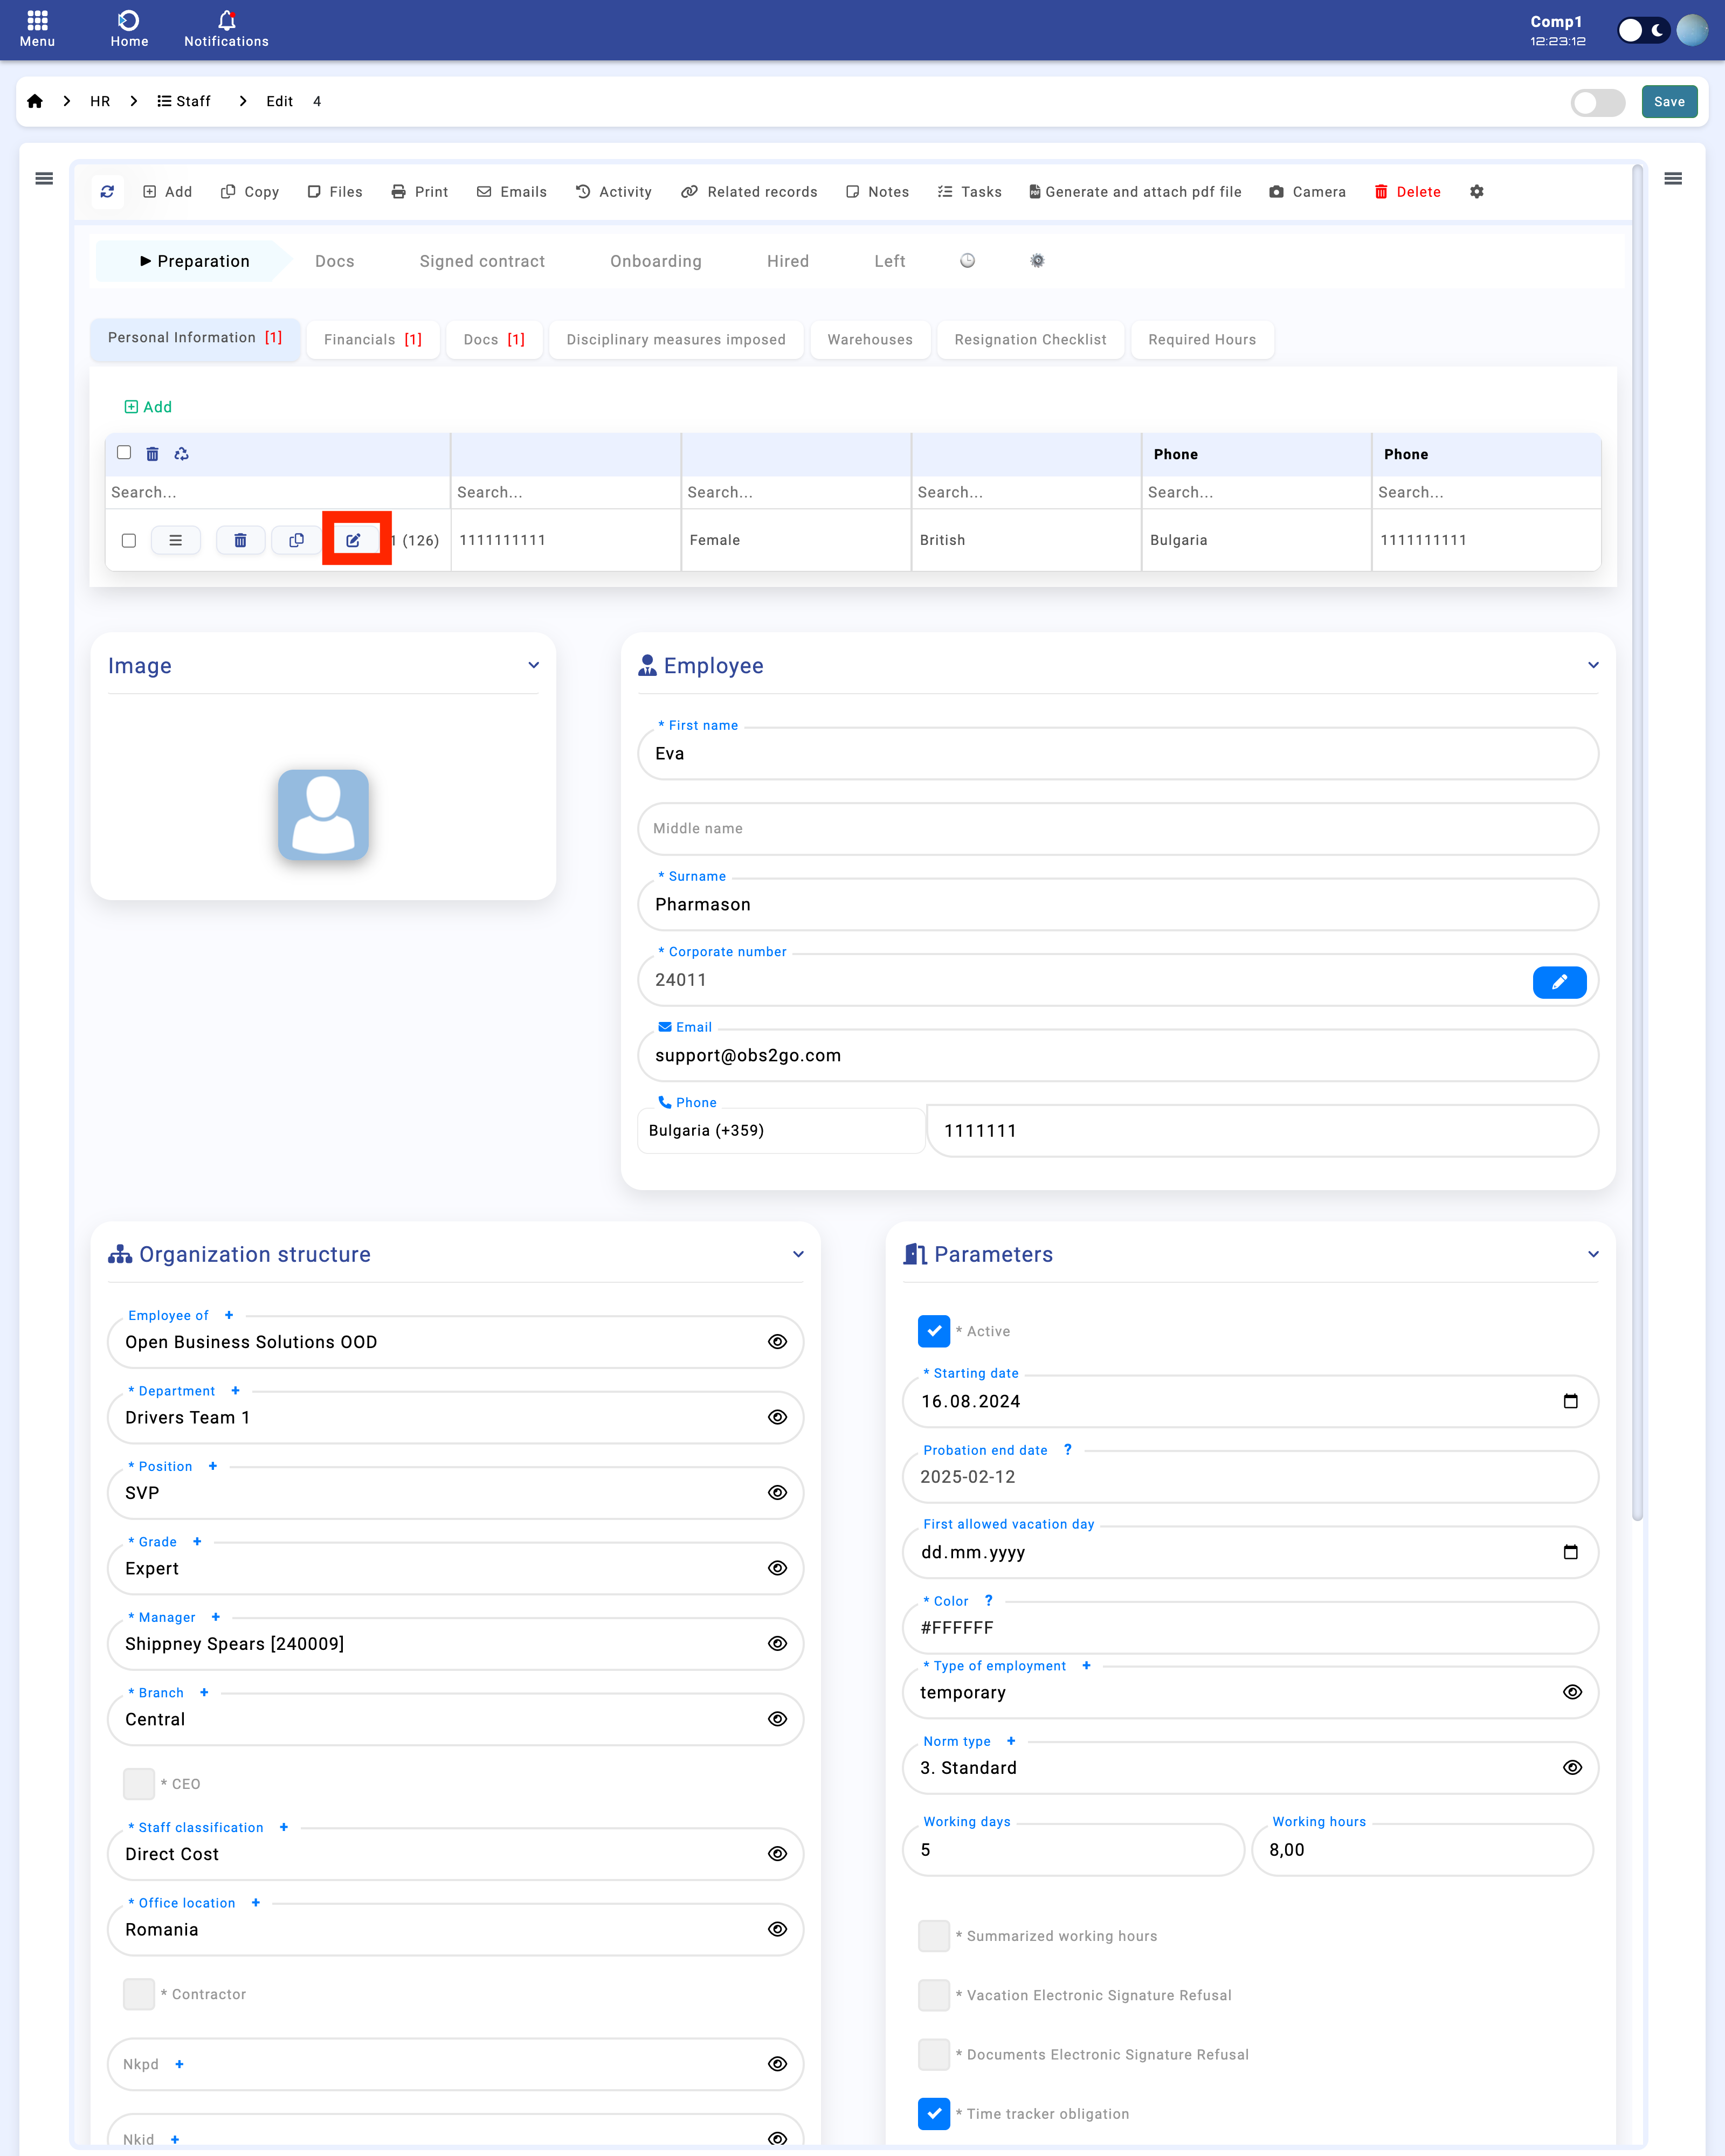
Module 'Staff' -> Edit personal information button
1. Navigate to the appropriate module for the information you wish to manage (such as Organizations, Departments, etc.).
2. To create a new record, click the "Create" button at the top right of the module. A form will appear - fill in all required fields. If any mandatory field is missing, the system will alert you and prevent record creation.
3. To edit an existing record, click on the record’s identifier on the left side of the module. Then click the "Edit" button to open the record for modification.
4. Update the necessary information. After making your changes, click "Save" in the top right corner to confirm the updates.
5. If deletion is permitted, you can remove a record by selecting it and clicking the "Delete" button.