HCM /
Human capital
/Digital signature
Digital Signature
E-Signature-Based Vacation Approval Workflow
This table outlines the steps involved in our vacation request approval process, leveraging electronic signatures for efficiency and security.
Each step is designed to ensure a smooth and transparent procedure, from submission to the final approval, highlighting the critical role of e-signatures in modernizing and streamlining administrative tasks.
| Step | Description |
|---|---|
| 1. Submission and Approval | The process begins with the employee submitting a vacation request. The manager then reviews and decides whether to approve or reject the request. |
| 2. Electronic Signature Check | After approval, the system verifies if an electronic signature is necessary for the request:
|
| 3. Document Generation | The system automatically creates a PDF document and attaches it to the vacation request. |
| 4. Sending for Signature | The document is then sent to the requesting employee through their Evrotrust app for electronic signature. |
| 5. Employee Signature | Once received, the employee signs the document electronically using Evrotrust. |
| 6. Manager Approval | After the employee signs, Evrotrust sends the document back to the system, which then forwards it to the employee"s direct manager for signature. |
| 7. Final Approval | The direct manager signs the document using Evrotrust, and upon completion, the system updates the status of the vacation request to "Approved and Signed." |
All relevant documents, including the unsigned original, the document signed by the requester, and the document signed by both the requester and their direct manager, are easily accessible within the vacation request.
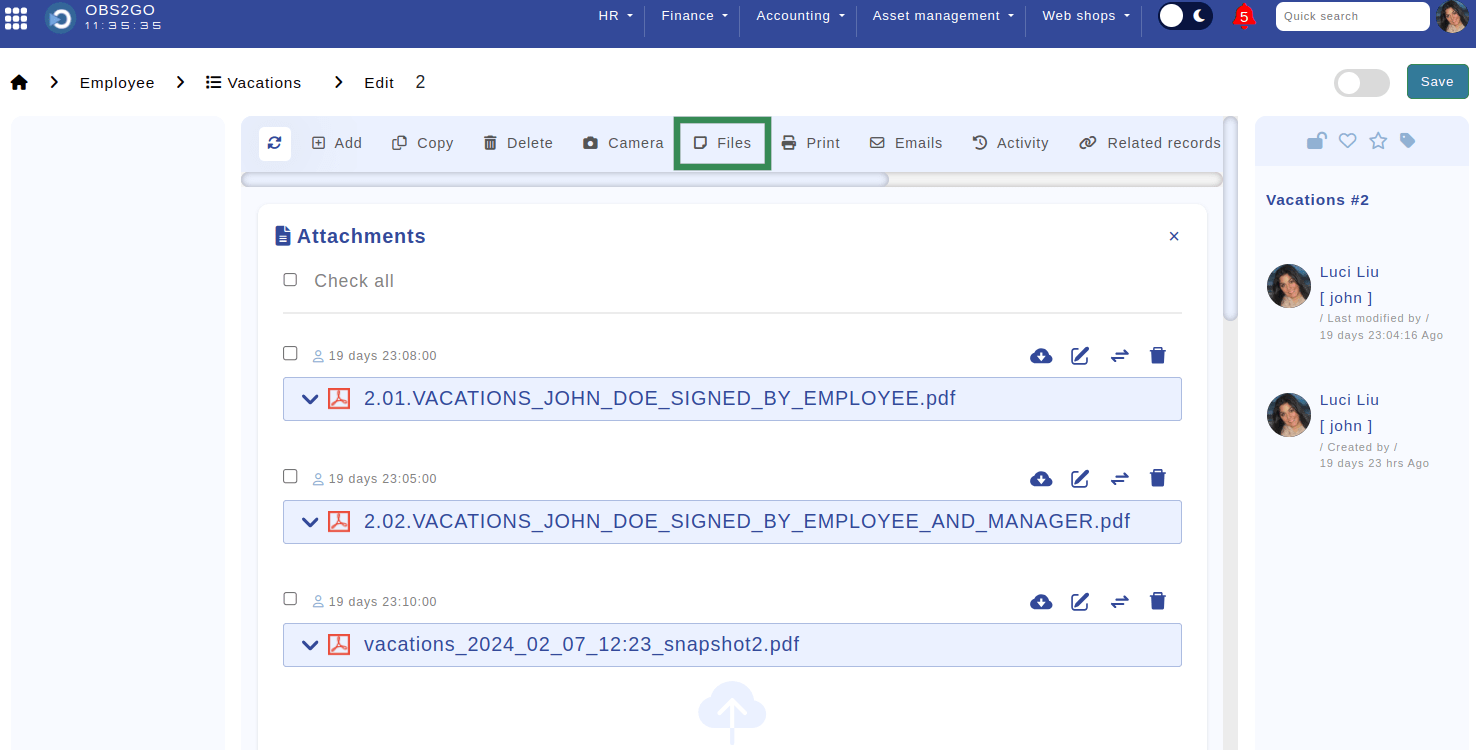
Location: Home > Employee > Vacations > Edit > Files. Highlighted is tab "Files" where all related documents are found.
Here, you can review the entire process related to e-signatures within the system of managing time off requests: Electronic Signature Process.
Pre-configurations
Before setting up Evrotrust in OBS ERP, ensure that the following pre-configurations are completed:
System Email:
- Configure a system email account in Home > Control Panel > System email.
- This email account will be used for sending email requests and notifications.
- Below is a brief video demonstrating the setup of a system email:
https://youtu.be/mFpTMFOPCtI?si=PU6L7JNMfeUXBIGs
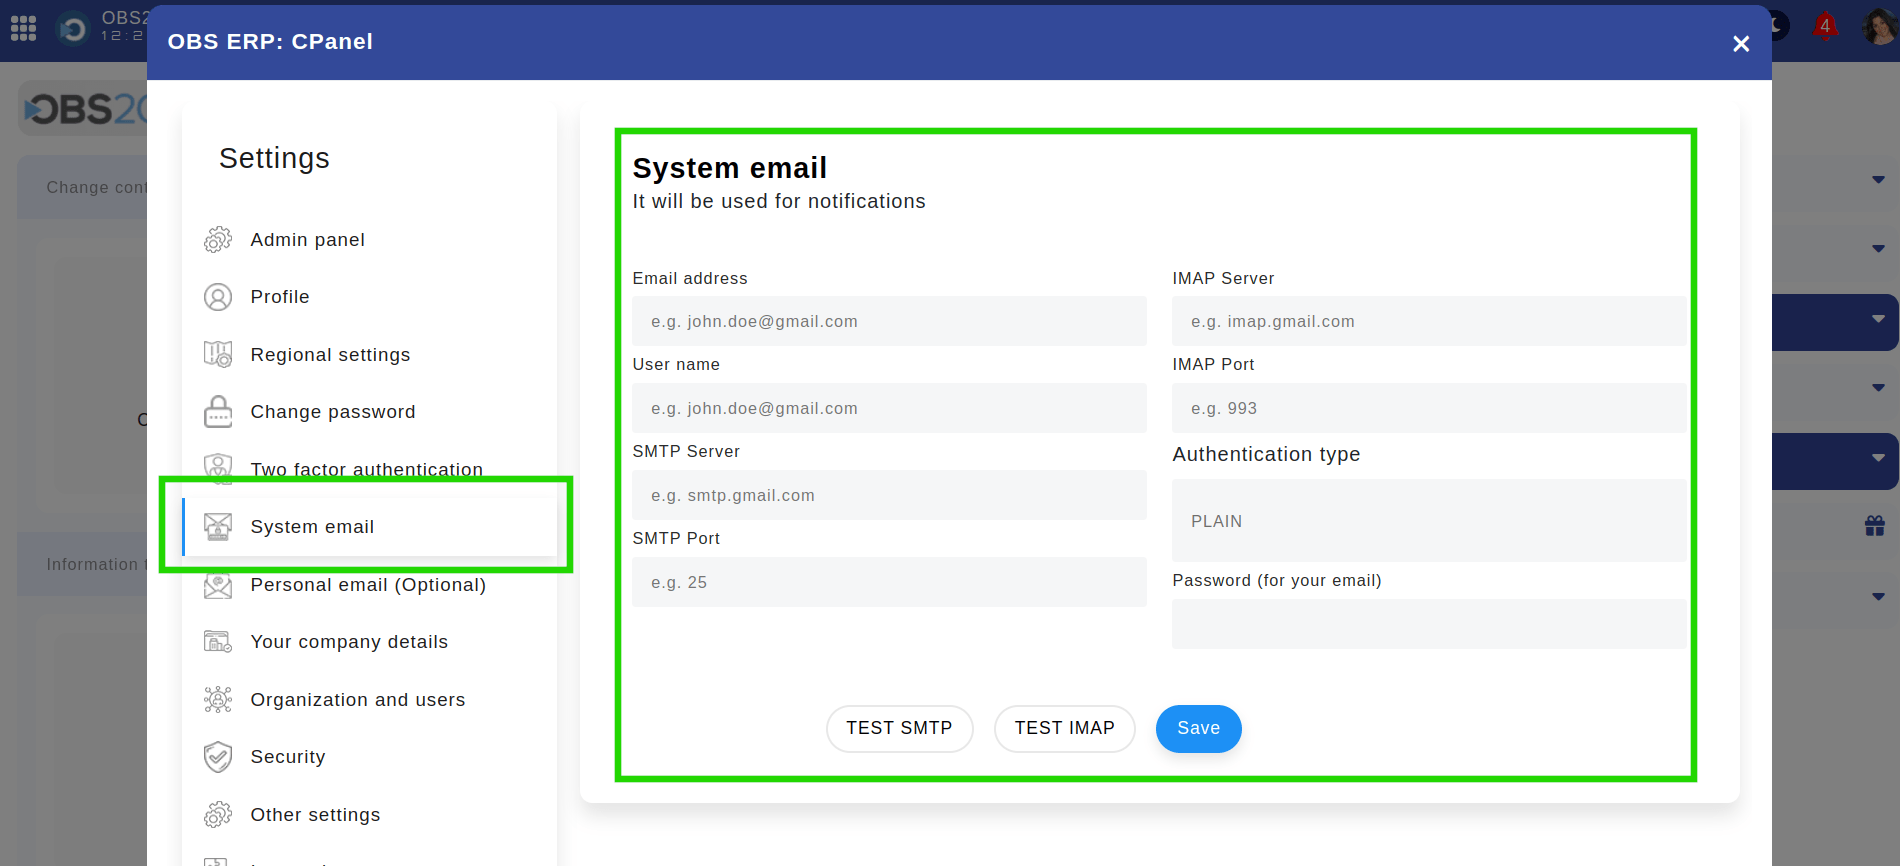
Location: Home > Control panel > System email. Highlighted are section "System email" and its settings.
Initial Set up of Evrotrust in OBS ERP
To integrate Evrotrust into OBS ERP, follow these steps:
1. Enter Evrotrust API Key and Vendor Number
Enter the Evrotrust API Key and Vendor Number in OBS.
This can be done in two locations:
- Module "Settings":
The "Settings" module is designed for configurations within a single organization using OBS ERP.
For accessing the Evrotrust configurations, navigate to the "Settings" module and use the quick search feature to easily find all Evrotrust-related settings.
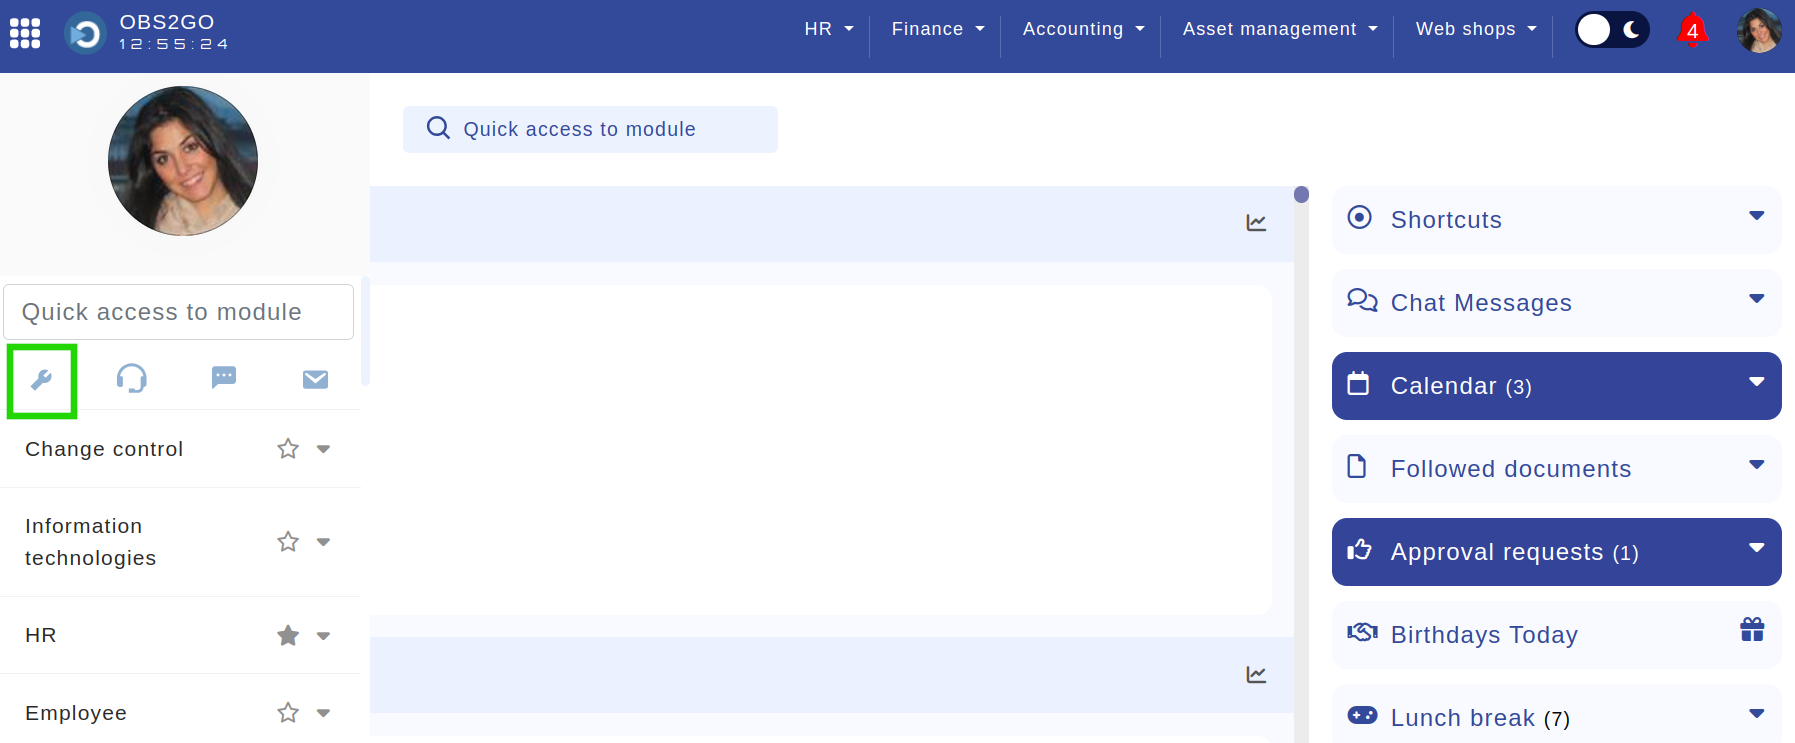
Location: Home > Left panel. Highlighted is the "Control panel" button.
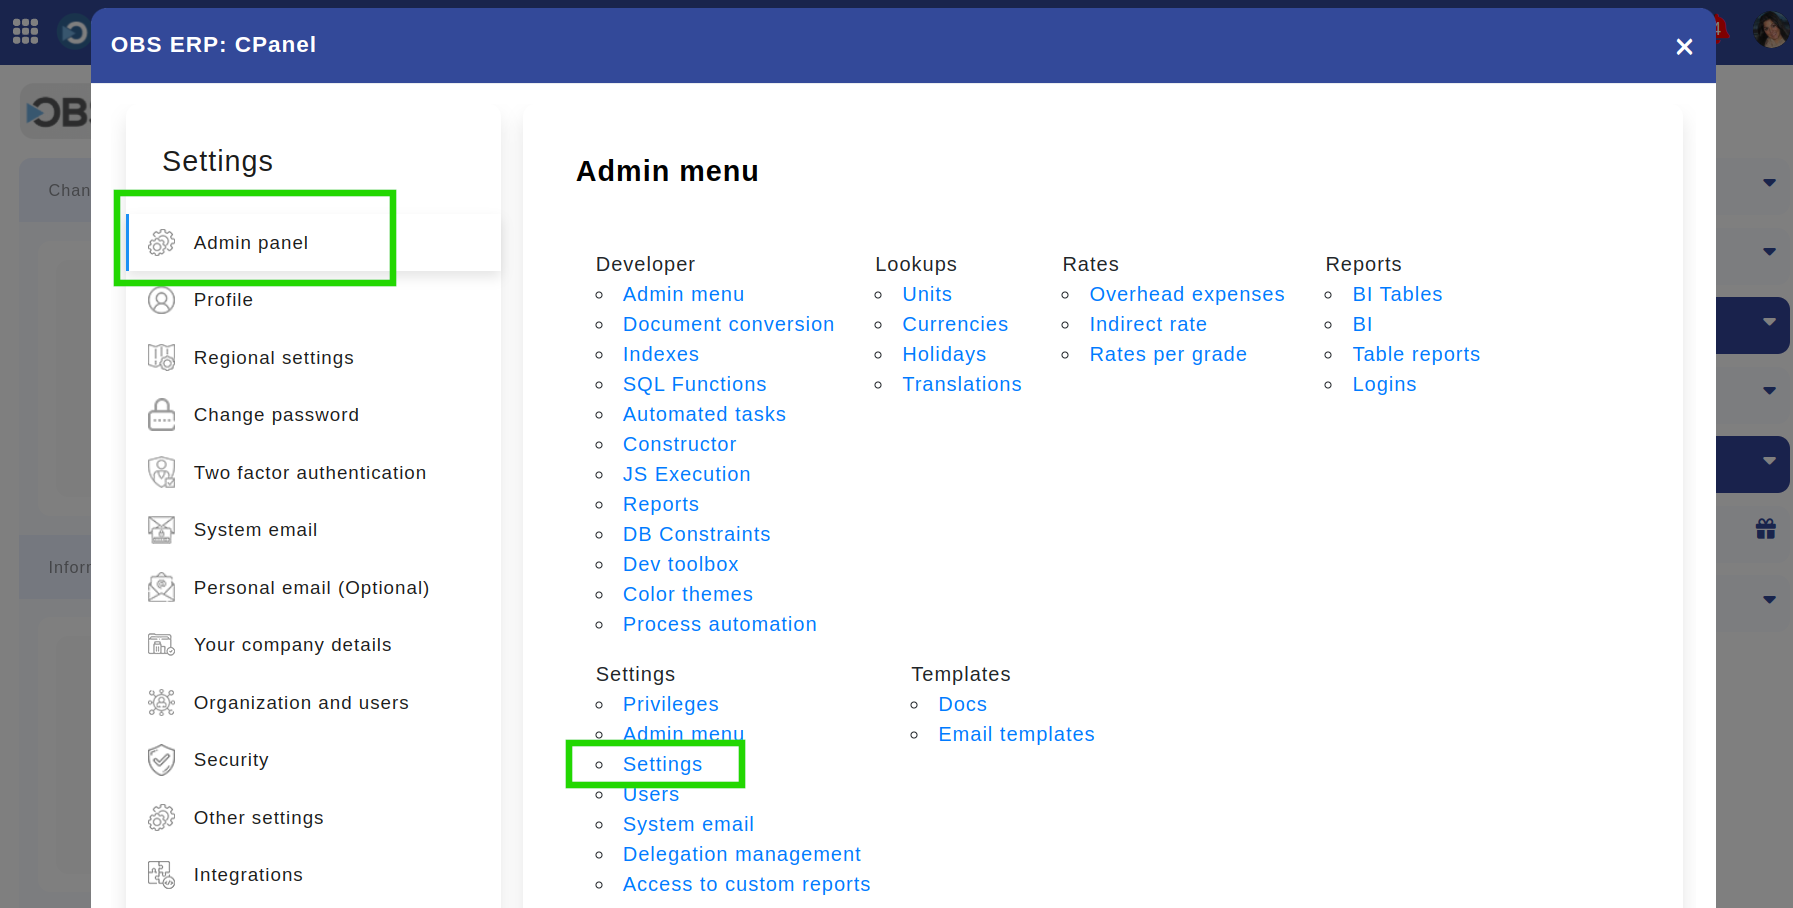
Location: Home > Control panel. Highlighted is "Admin panel" section, and next the button that leads to page "Settings"
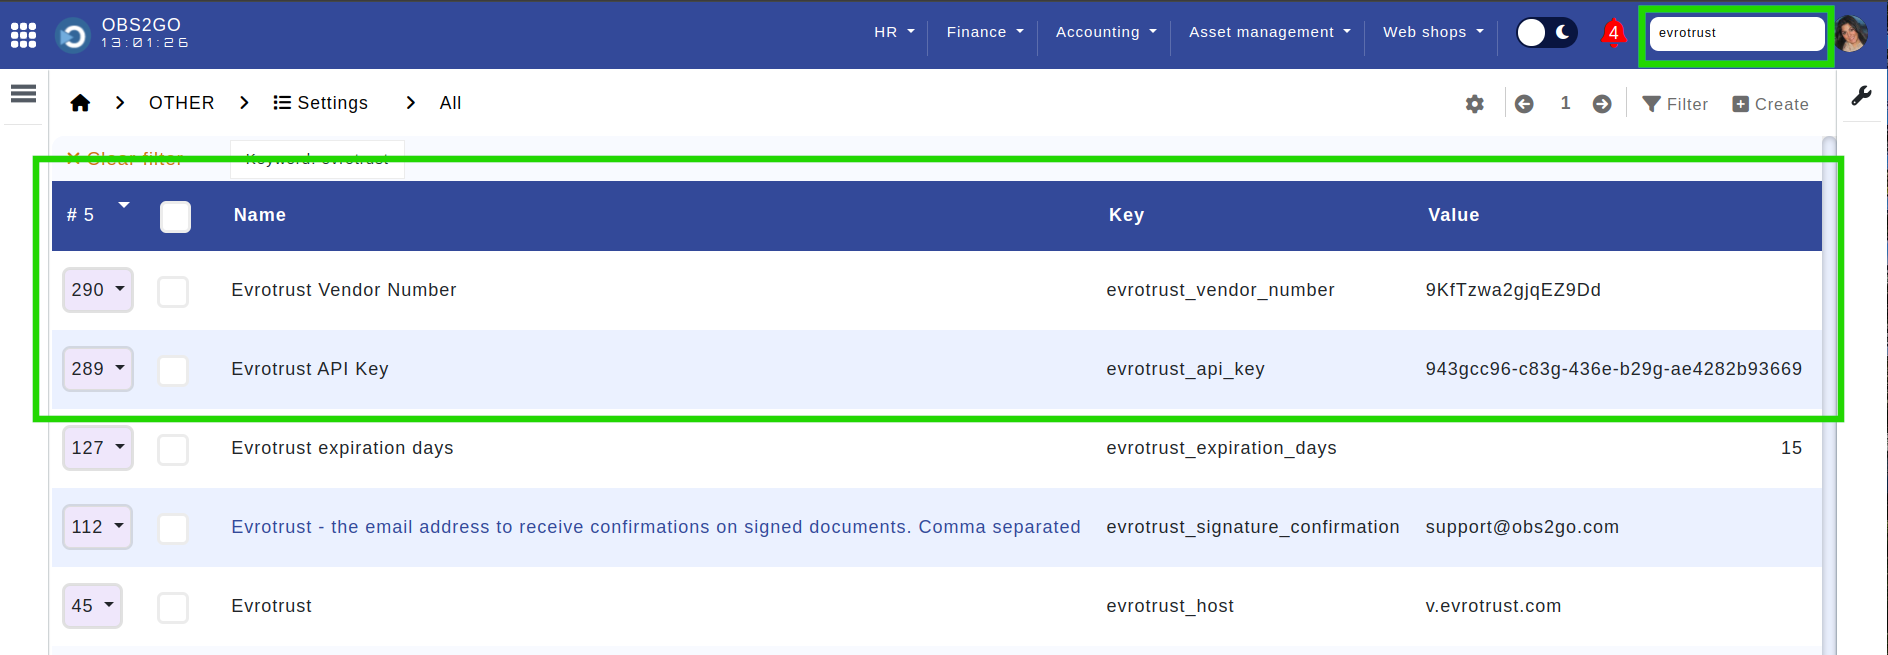
Location: Home > Control panel > Admin panel > Settings > Settings. Highlighted is the quick search, along with the two settings "API Key and Vendor Number".
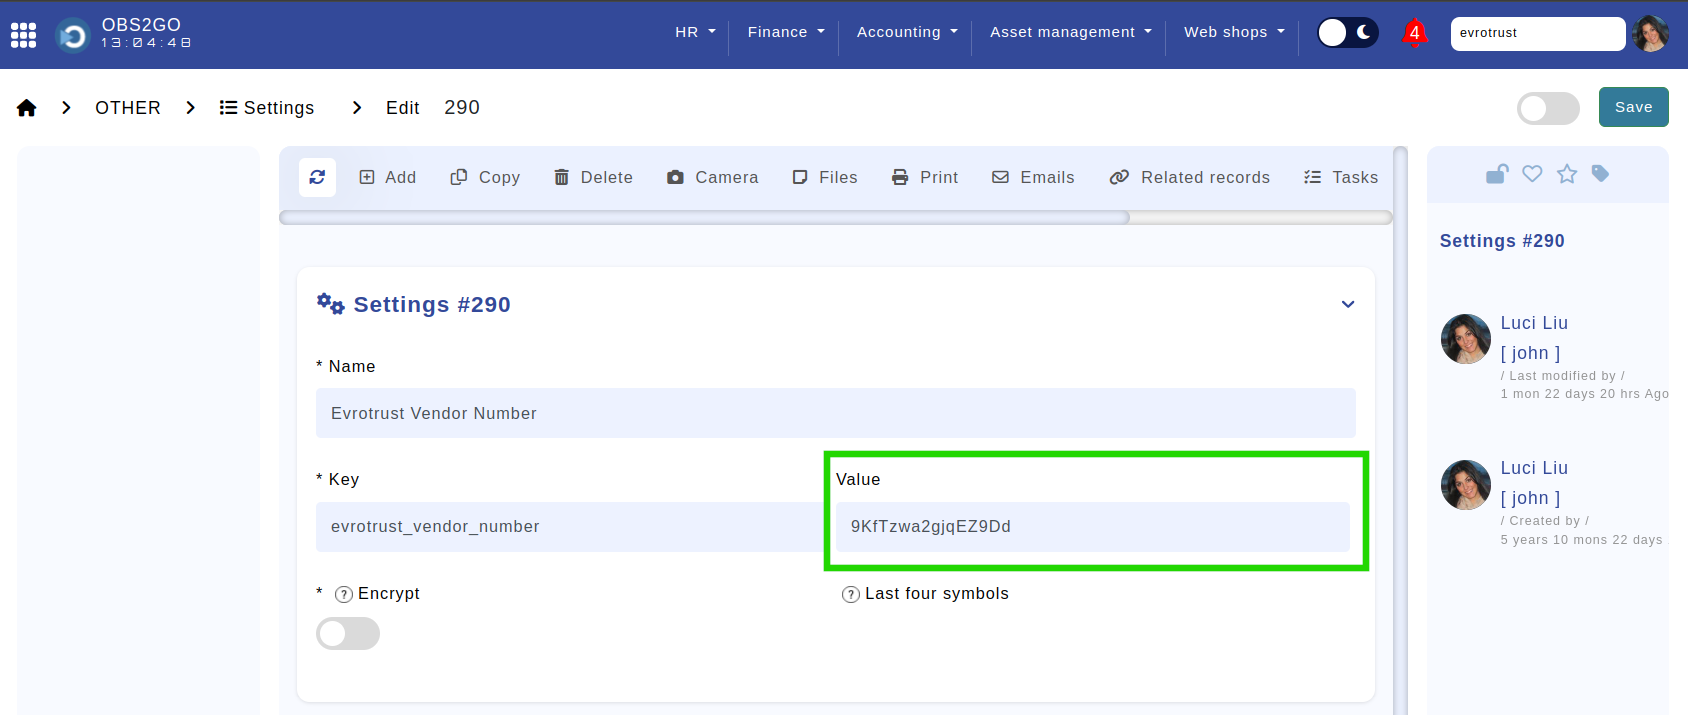
Location: Home > Control panel > Admin panel > Settings > Settings > Evrotrust Vendor Number. Highlighted is the value where you need to enter your vendor number. The steps for entering the API Key are the same.
- Module "Evrotrust Keys by Companies"
It facilitates the integration of OBS ERP with multiple organizations, enabling each to use a distinct Evrotrust account for secure transactions.
This module is easily accessible through the quick access feature or directly at: https://YOURINSTANCE.obs2go.com/modules/evrotrust_keys_by_company/all.
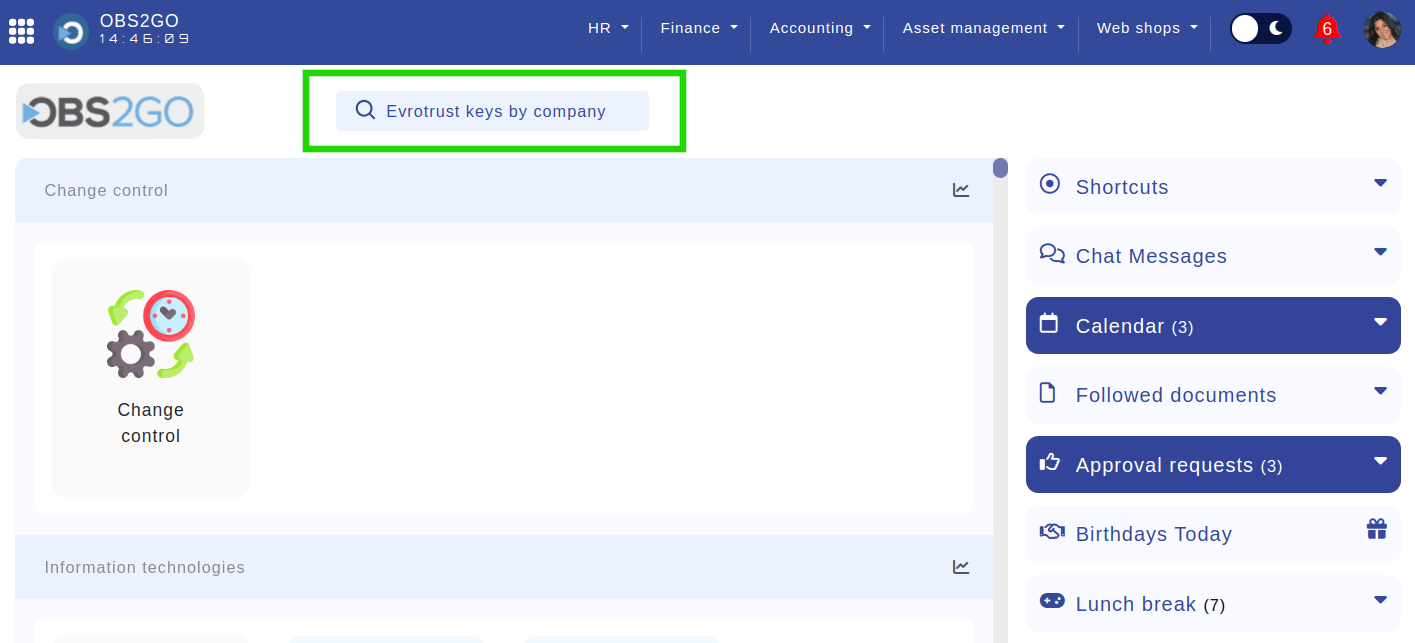
Location: Home. Highlighted is the field deisgned for quick search of modules.
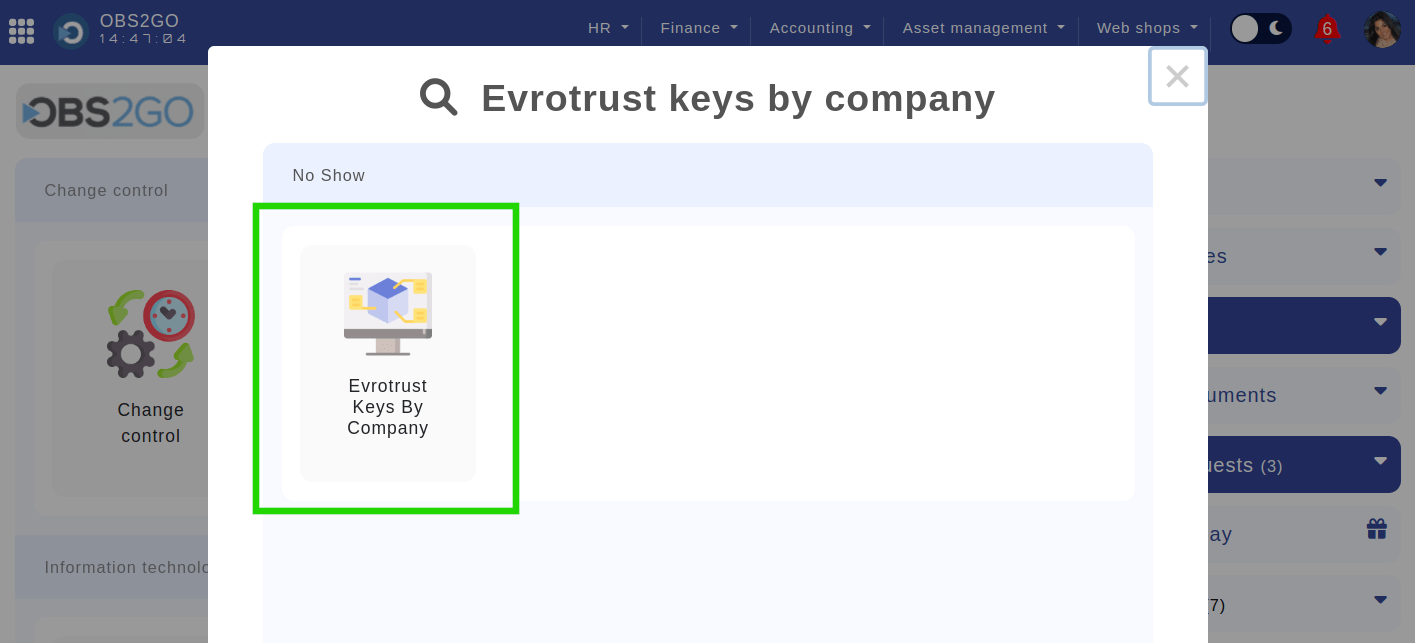
Location: Home > Quick Access to Module. Highlighted is module "Evrotrust Keys By Company".
Upon accessing the module, you have the options to add, edit, or delete record keys associated with companies.
To add new keys, simply select the "Create" button and complete the required fields.

Location: Home > Quick Access to Module > Evrotrust Keys By Company. Highlighted is button "Create" which opens the form for entering vendor number and API key for a company.
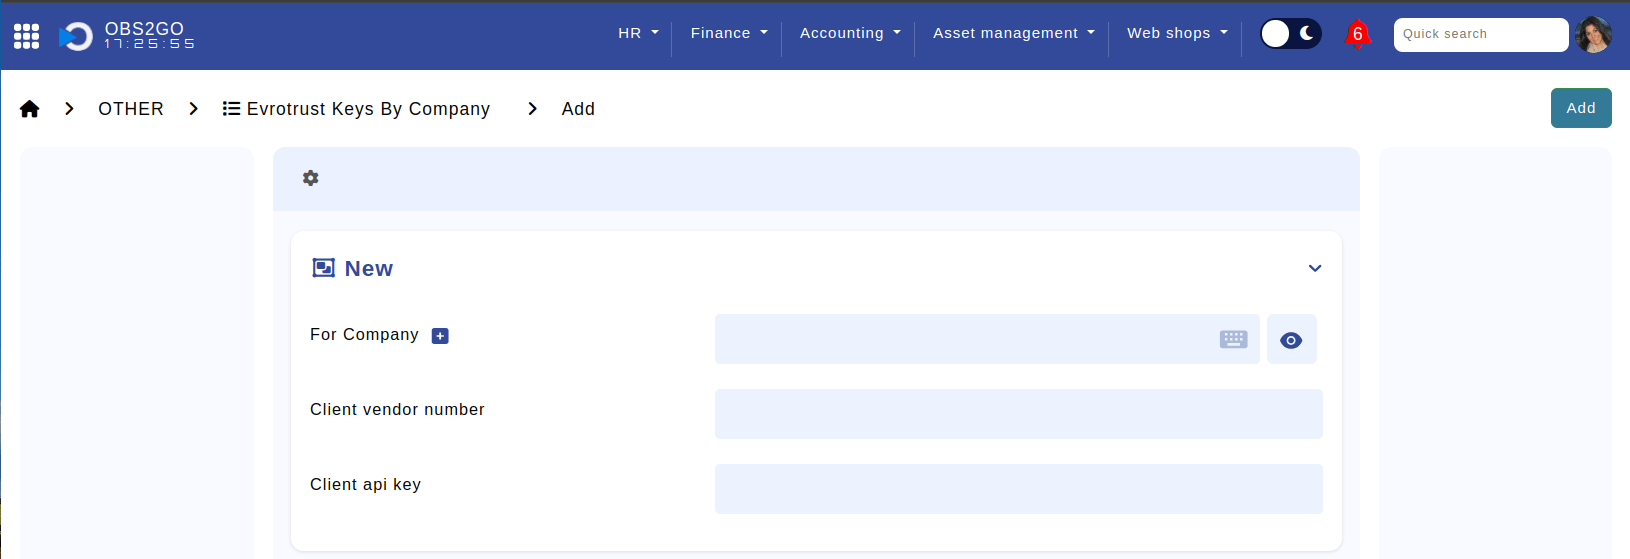
Location: Home > Quick Access to Module > Evrotrust Keys By Company > Add.
To edit existing keys, select the row and click "Edit".
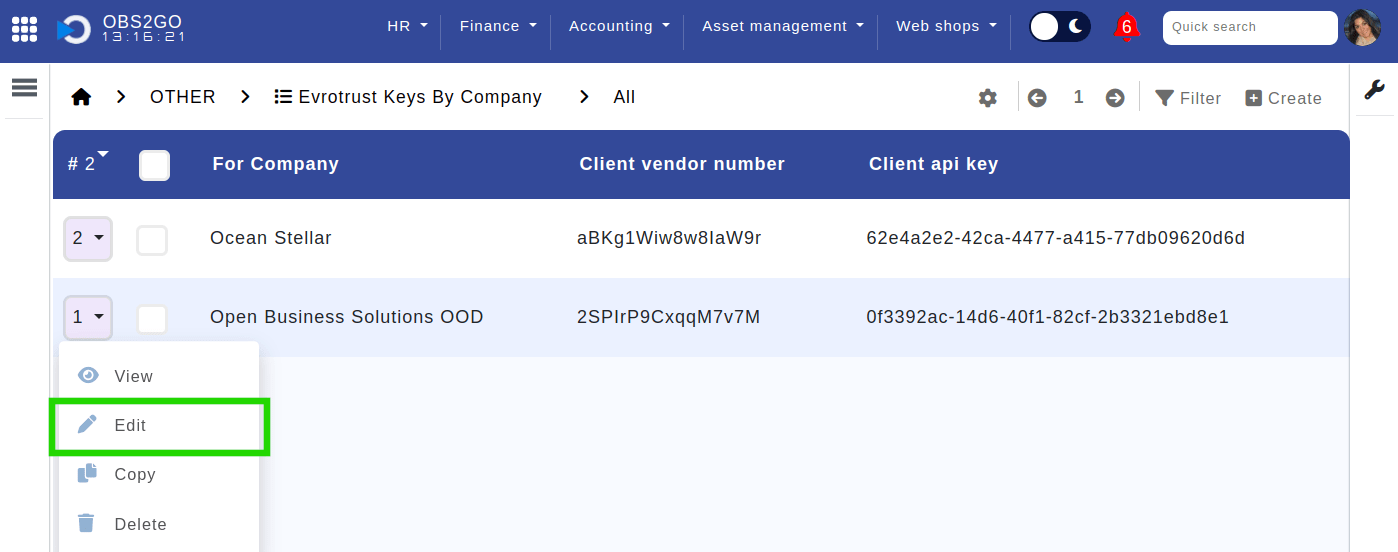
Location: Home > Quick Access to Module > Evrotrust Keys By Company. Highlighted is the "Edit" option, which, upon selection, enables the opening of a record for the purpose of inserting or amending keys.
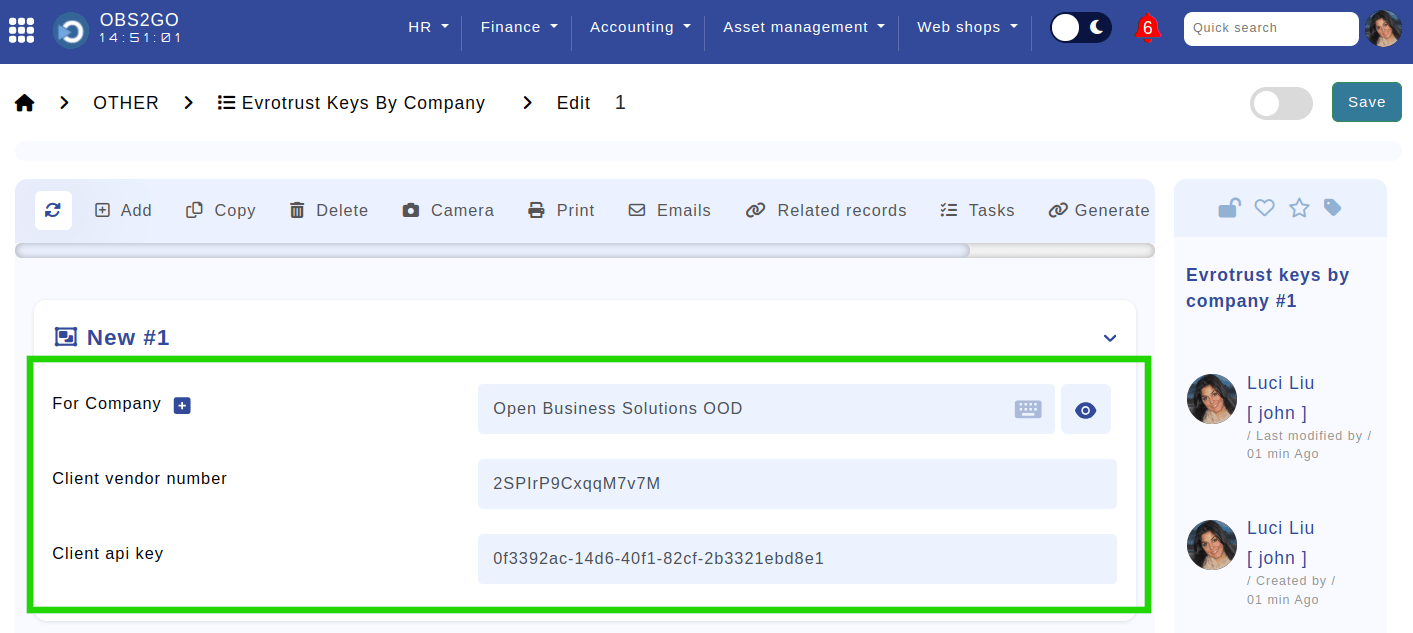
Location: Home > Quick Access to Module > Evrotrust Keys By Company > Edit [1]. Highlighted are the fields for Company, Vendor number, and API Key that can be edited.
To delete keys, simply click on the record, and select "Delete".
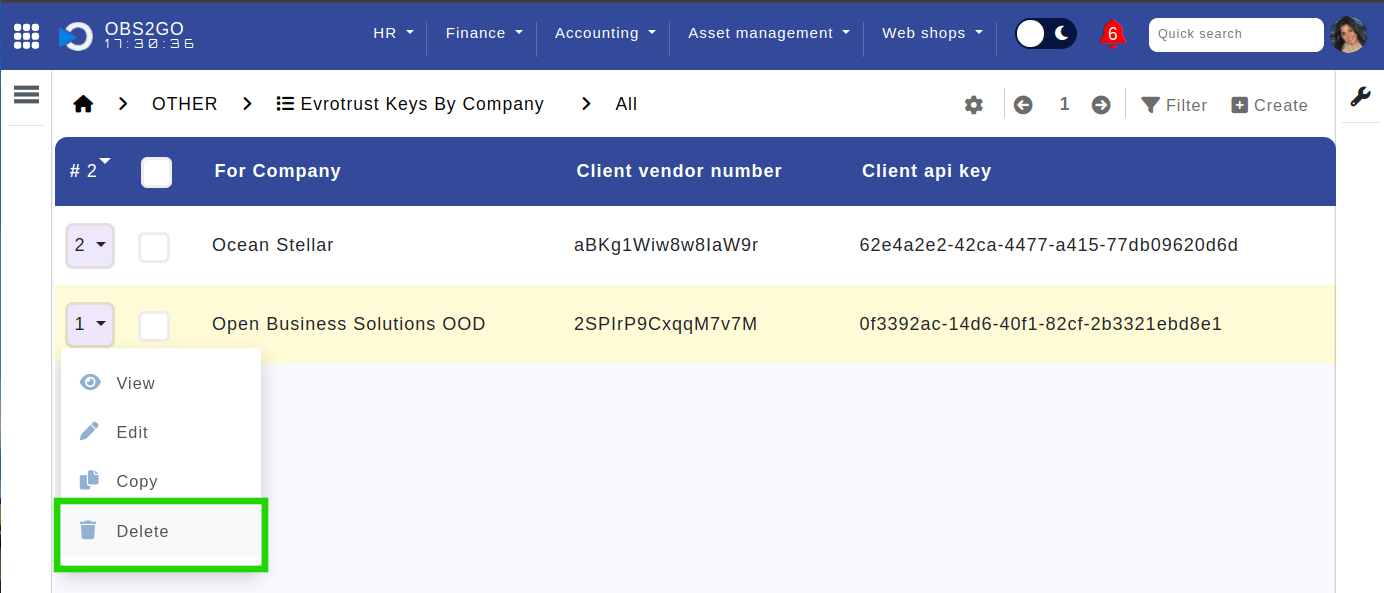
Location: Home > Quick Access to Module > Evrotrust Keys By Company. Highlighted is the "Delete" option, which, upon clicking, removes the record.
2. Other Setups in Settings
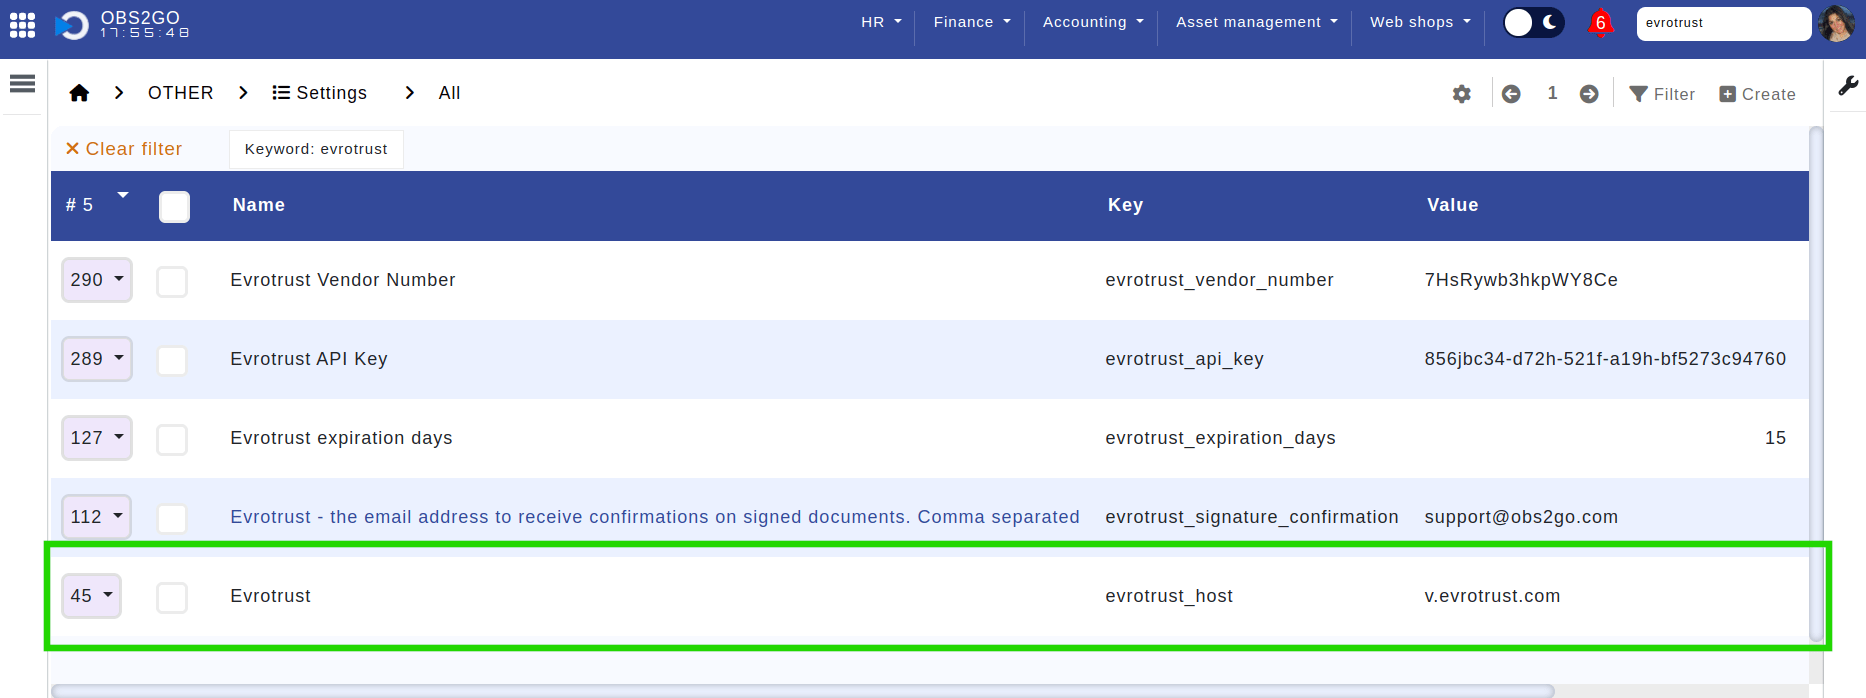
- Evrotrust Host: Set the host as "v.evrotrust.com."

Location: Home > Left panel. Highlighted is the "Control panel" button.

Location: Home > Control panel. Highlighted is "Admin panel" section, and next the button that leads to page "Settings"
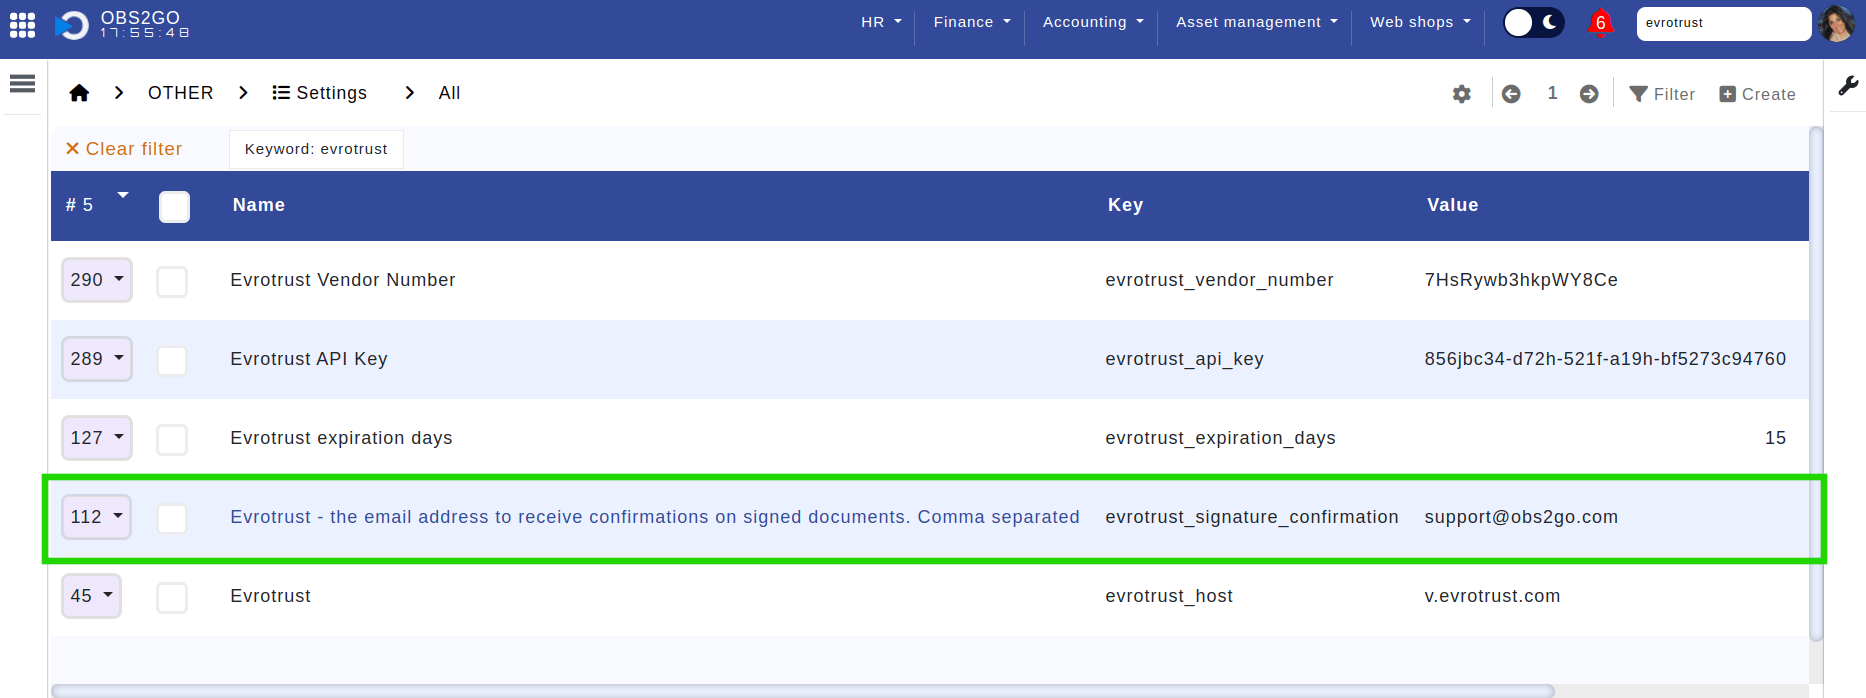
- Evrotrust Signature Confirmation Notification:
- Configure email notifications for each successful digital signature.
- Navigate to Control Panel > Admin Menu > Settings.
- Find "evrotrust_signature_confirmation", input the relevant email addresses and ensure to save changes for immediate effect.
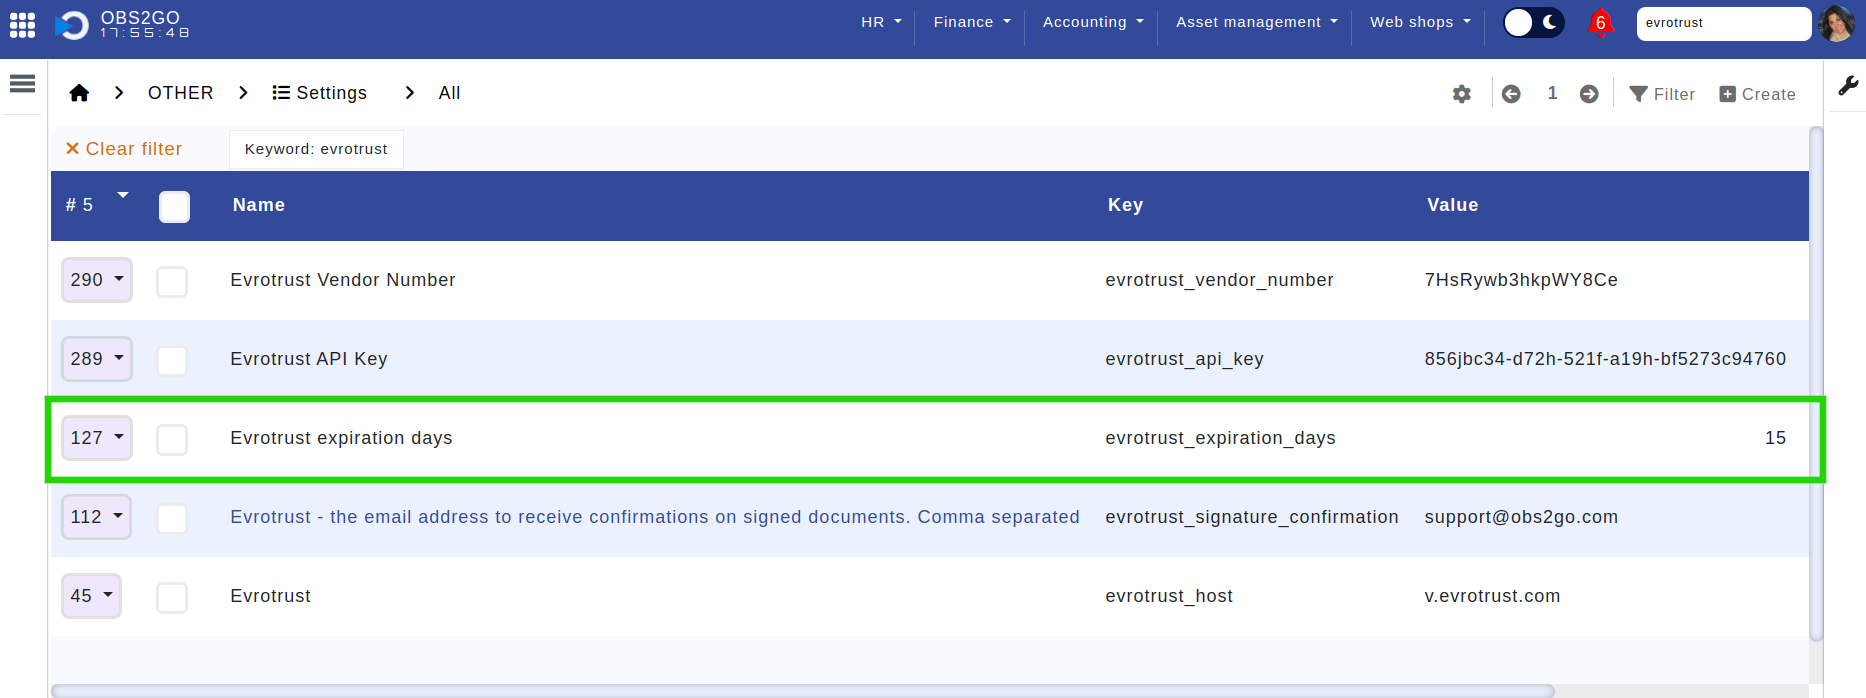
- Evrotrust Expiration Days: Set a default expiration period for documents. The default is 15 days.
Enabling E-Signature Settings
The activation of e-signature functionality involves several levels to ensure flexibility within the process.
| Configuration Area | Details |
|---|---|
| Constructor | Enable electronic signature options within the "Vacations" and "Cancelled vacation requests" modules to initiate general e-signature capabilities. IMG Constructor |
| Office Locations | Activate the e-signature option for specific office locations where it is required. IMG offices |
| Vacation Types | Customize e-signature settings by enabling or disabling the feature for different vacation types. For instance, e-signature may not be necessary for sick leaves, maternity, paternity, etc. IMG vacation types |
| Employees (module Staff) | Consider individual preferences by activating the "Vacation Electronic Signature Refusal" button. This allows employees who prefer manual paper signatures or decline third-party software to opt out of e-signature requests after approval. IMG staff |
Entering Essential Employee Personal Data
To fully utilize EvroTrust integration, it"s essential to provide accurate employee details such as nationality, personal identification number (PIN), personal email, and personal phone number.
These details should be updated in the "Staff Personal Information" section, accessible within the "Staff" module.
IMG staff personal information
It"s important to note that depending on an employee"s nationality, different data sets are transmitted to Evrotrust for validation.
In cases where certain countries do not employ personal identification numbers, personal email or personal phone numbers are used instead.
For reference, you can consult the list of supported countries within the Evrotrust system by following this link: https://www.evrotrust.com/doc/eIDAS/Countries_en.html
Verifying Employee Connection in Evrotrust
OBS offers a convenient way to check if an employee is connected within Evrotrust.
To perform this check, navigate to the employee"s profile in the "Staff" module and click on the "Check user in Evrotrust" button.
If the check returns an error, it could be due to two possible reasons:
- The employee has not installed or signed up within the Evrotrust application.
- Personal data in the "Staff Personal Information" module is inaccurate. This could be attributed to discrepancies in the personal identification number (PIN), phone number, nationality, or email address.
IMG - button
IMG - success
IMG - success
Document Templates
Document templates are essential components stored within the target module, such as templates for vacation requests or cancellation requests.
These templates are utilized to generate PDF documents, which are subsequently sent for digital signatures.
To access and manage these templates, navigate to the "Admin Panel", select "Templates" and find/create templates for modules "vacations" and "cancelled_vacation_requests".
IMG navigate to documents
IMG document template
Workflow Automation Setup
To achieve complete workflow automation, configure the following four automated tasks in module "Main Scheduler":
| Automation Task | Description |
|---|---|
| Signature Expiry Management | This task generates notifications for signatures that are about to expire (sent 1 day before expiration). IMG of the main scheduler |
| Signature Renewal Notifier | This task sends notifications for signatures that are about to expire (sent 1 day before expiration). IMG of the main scheduler |
| Expired Vacations Update | This task detects when a document has expired and moves the vacation request to the "Approval Expired" status. IMG of the main scheduler |
| Expired Vacation Cancellations Update | This task detects when a document has expired and moves the cancellation vacation request to the "Approval Expired" status. IMG of the main scheduler |
Additional materials:
- EvroTrust: https://evrotrust.com/
- Evrotrust qualified signature videos - https://www.youtube.com/watch?v=589PlxeRXOA
- OBS - Approval with eSignature https://www.youtube.com/watch?v=yAThZFEyCBA (Outdated interface, in Bulgarian)
