Leave management
/Leave Management Setup
Leave Management Setup
Setting up the leave management solution requires two key steps: updating staff data and importing approved paid leave records. Follow the instructions below to ensure the system is configured correctly.
1. Updating Staff Data
Ensure the most up-to-date information for "Vacation days per contract" and "Vacation days in the current year" is available in the Staff module. These fields are essential for calculating annual leave balances.
- Vacation days per contract: Total paid leave days specified in the employee's contract.
- Vacation days in the current year: Available paid leave for the year, calculated as:
- Contract days + Transferred leave from past years, or
- Pro-rata based on the employee's start date (e.g., 15 days for an April 1 start with a 20-day entitlement).

Screenshot: Staff module highlighting the two vacation day fields.
If the client starts using the solution at implementation, import the most updated data during setup.
Otherwise, existing data can be updated as follows:
- Navigate to Home > HR > Staff.
- Open the left panel and click "Backup in Excel" to download current staff data.
- Update the columns "Vacation days per contract" and "Vacation days in the current year" in the downloaded file.
- Important: Remove all columns related to submodules to simplify the file for upload. The submodule data appears after the Staff module columns in the Excel file. Additionally, ensure that each employee appears only once in the file. In cases where submodule records (e.g., documents, benefits) cause duplicate rows for the same employee, delete the duplicate rows. This ensures a clean and simplified upload.
- Open the left panel again, select "Import XLSX", click "Import", and upload the updated file.
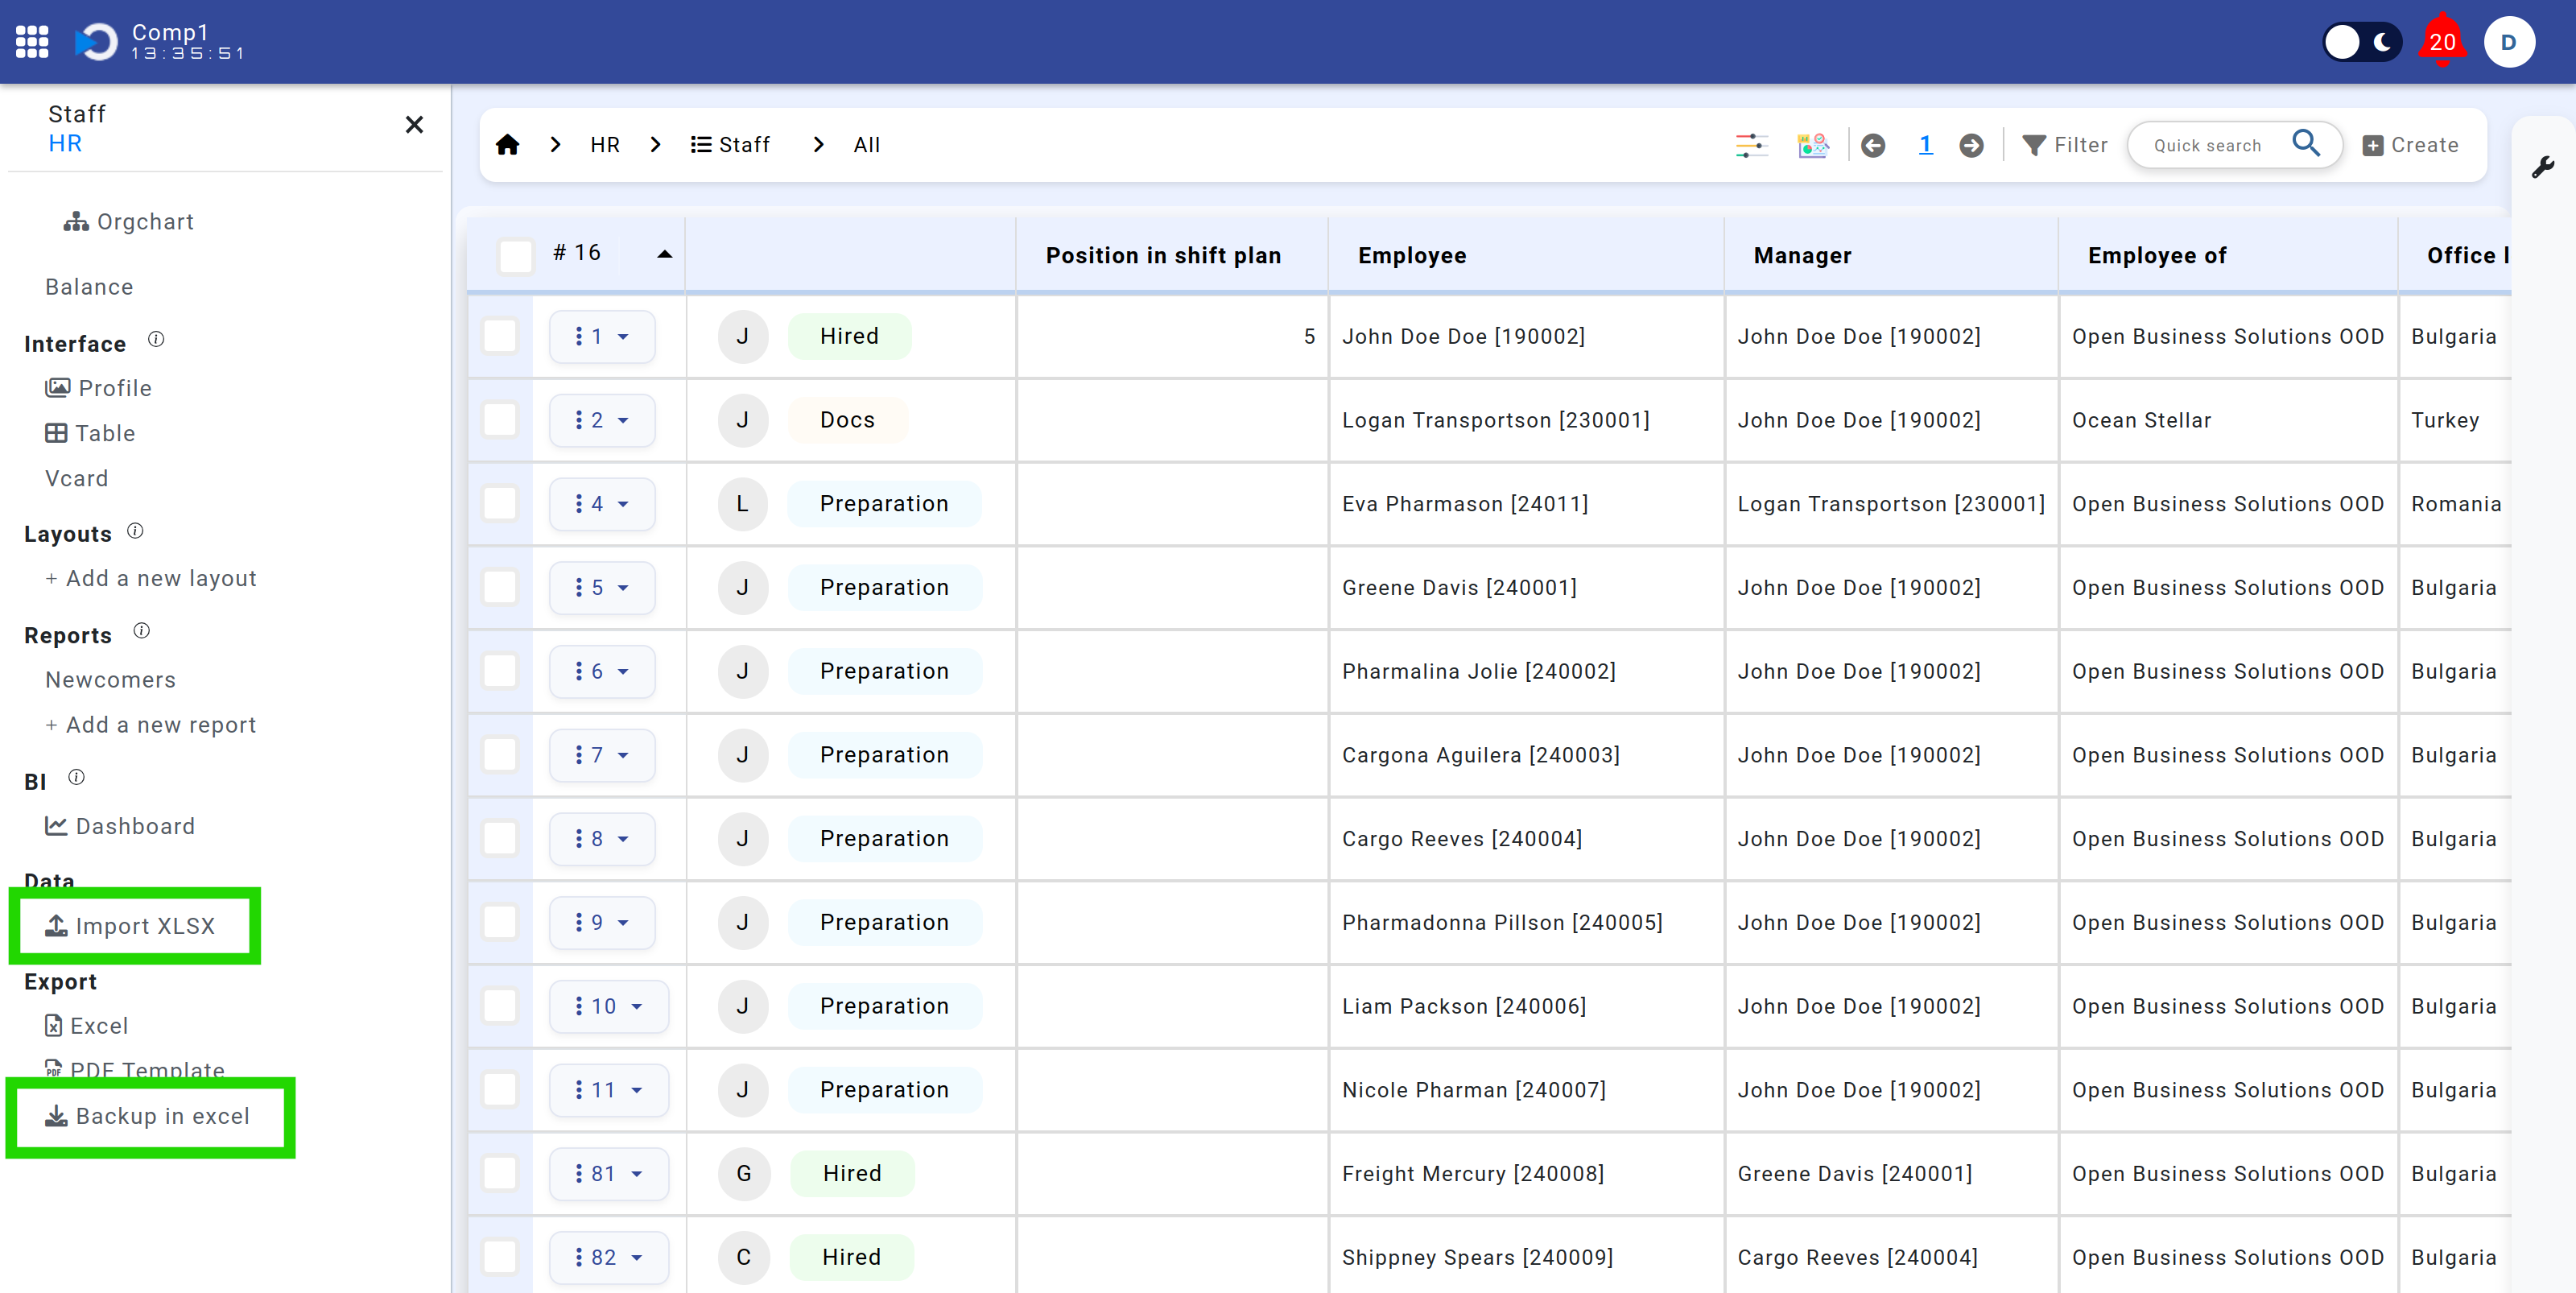
Screenshot: Staff module left panel showing backup and import options.
2. Importing Approved Paid Leave Records
To upload approved paid leave records for the current year:
- Go to Home > Employee > Vacations.
- Click "Vacations" to switch to table view.
- Open the left panel and click "Import XLSX".
- In the popup, click "Template" (under "1. Download a template and fill in the data") to download the template file.
- Fill in the template with approved leave records, ensuring the following format:

Screenshot: Import XLSX popup in the Vacations module.
- Column ID: Numbered sequentially (1, 2, 3...).
- Employee Name: Format: Firstname Middlename Familyname [Corporate Number].
- Vacation Type: "Annual paid leave / Платен годишен отпуск".
- Start: Start date of the leave.
- End: End date of the leave.
- Approved: "true".
- Status: "approved__".
Once the template is completed, return to the popup, click "Import XLSX", then press "Import" to upload the file.
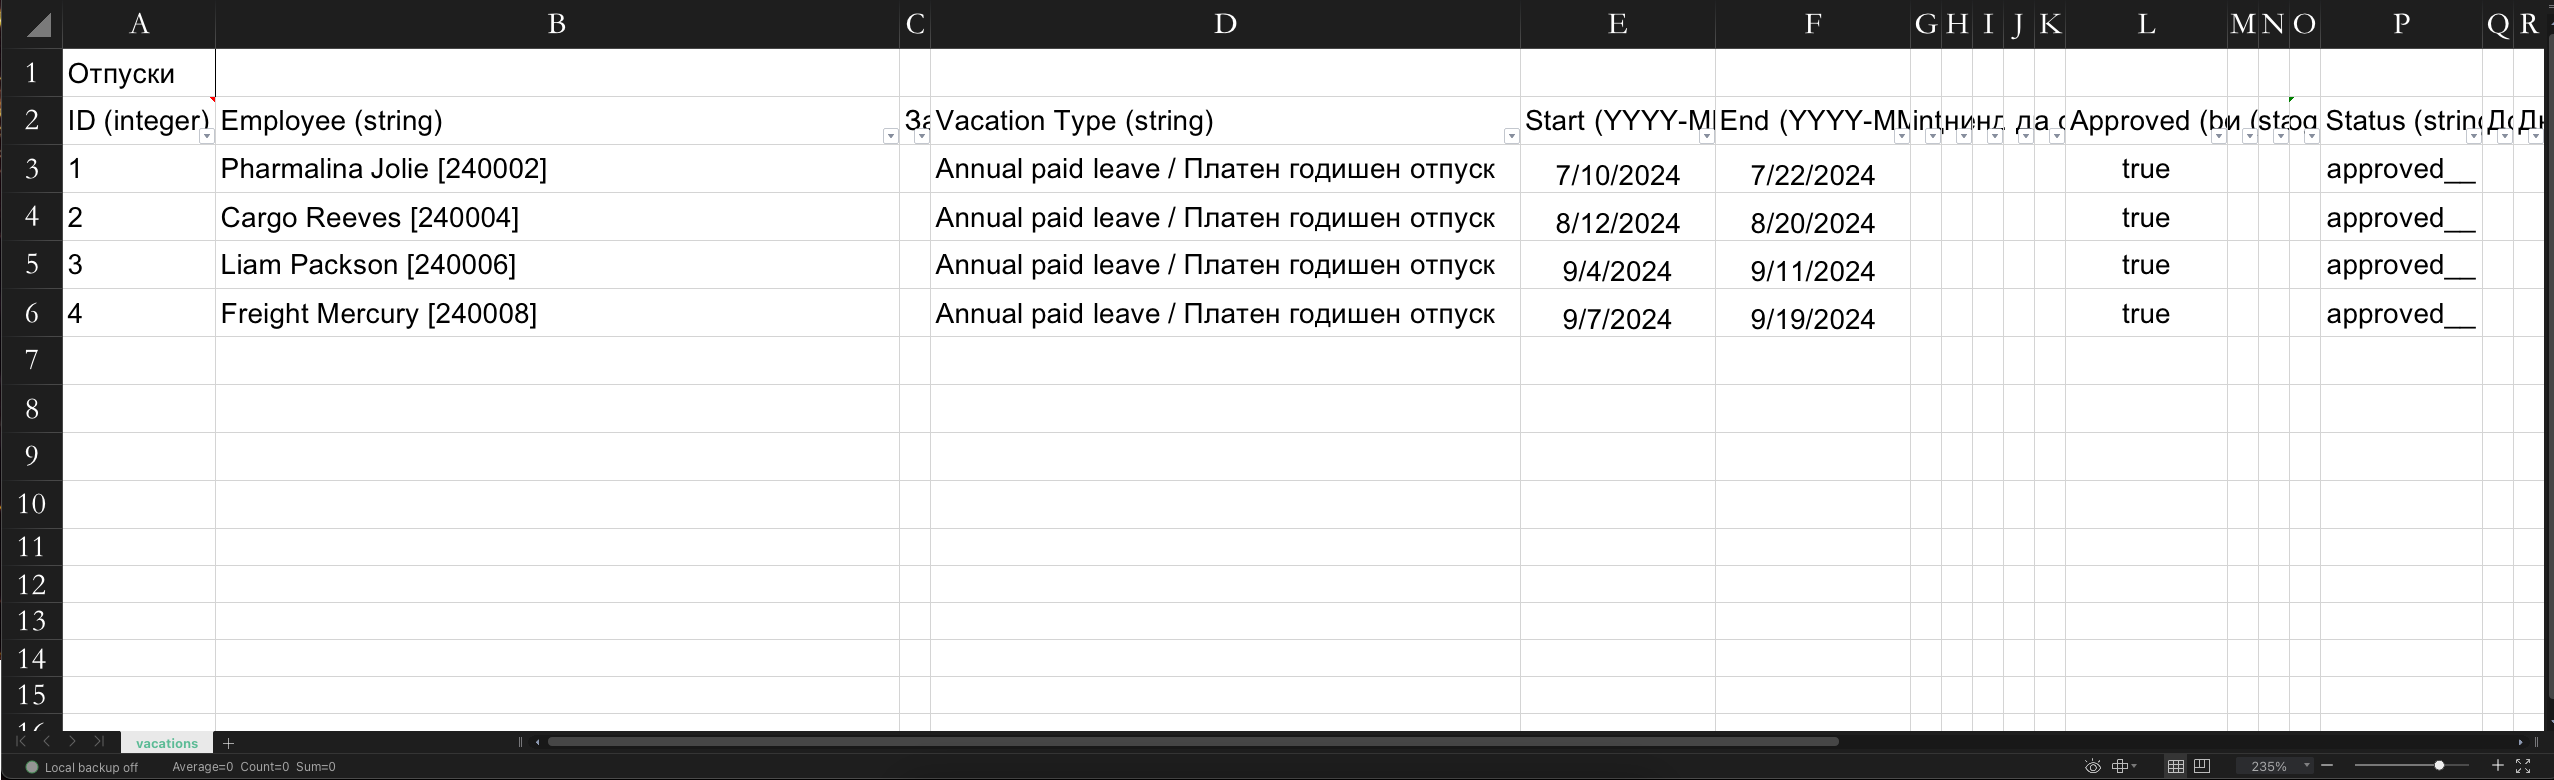
Screenshot: Example of approved leave data in Excel format ready for Import.
With these steps completed, the leave management solution is fully configured and ready for use.